Well, for starters, it’s made out of straight cuts of wood glued together to form sturdy slabs. It’s used for cutting boards, tabletops, and countertops! Butcher-block counters are great for those who love the wood aesthetic, as well as those who can properly maintain a counter. When taken care of, the butcher-block counter can last years. Be wary, however, that without the proper care, these counters can dull and crack. With the proper care, they can give your home a vintage, welcoming vibe. They typically go for $40-$65 a square foot, depending on which style/manufacturer you’d like.
Types of Butcher-Block
There are also two things to think about when choosing a butcher-block counter. One is the wood grain type, and another is whether to seal it or not. There are three types of wood grain: edge grain, face grain, and end grain, and each offers its own unique qualities.
The first type, edge grain, is affordable and durable. It’s made by placing long boards on their sides to make a surface from the narrow edges. The second is face grain. This is when the boards are put together with the faces of the wood facing up. It’s less practical than the other styles because you can leave marks on it when chopping food. The last style is the most popular, end grain. The wood is laid so that the growth marks (ends) face up. However, it is also the most expensive type because it camouflages knife marks and is also extremely durable.
After considering the type of grain you want, decide if you want to seal the wood or not. Sealing it can take away from the soft look of the wood (it’ll become shiny). On the other hand, it’ll last even longer when sealed properly.
Things to Consider
Worried about nicks and burns? Unlike other countertop materials, butcher-block can be lightly sanded and oiled to look brand new again. Or, you can leave the marks be if you’d like your kitchen to have a little character. However, some more things to consider are if the properties of wood counters are suited for your needs. For example, wood swells or shrinks in times of humidity/dryness. Also, patina may develop on the surface over time, which can either be desirable or not depending on your taste. Lastly, excessive wetness may cause the wood to rot if it isn’t sealed.
Still not sure? Mark Reilly, a Californian Architect, decided on butcher-block counters for his client. He said, “The countertop was originally Formica, but the client wanted a material that didn’t clink when glass or serving wares were placed on it. After exploring several options, we decided on end-grain butcher-block because of its warmth, soft feel, and vintage-inspired look.” You can see from the Basic Builders projects below that it does indeed give a vintage, warm feel to the room. All it requires is some upkeep. Someone once stated a great tip: “Oil the butcher-block once a day for a week, then once a week for a month, then once a month for a year- I’ve followed this rule for a year and could not be more happy with the result!” (Update: Others recommend oiling every 6 months).
Now, let’s go to the gallery!
Ways to Style Wooden Counters (+Basic Builders Projects)
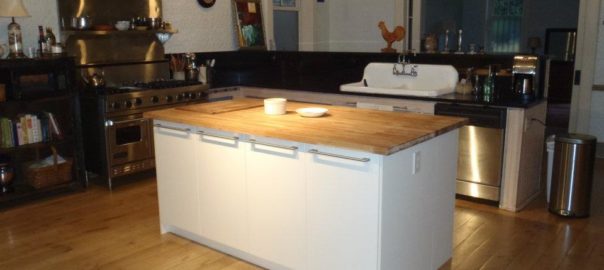
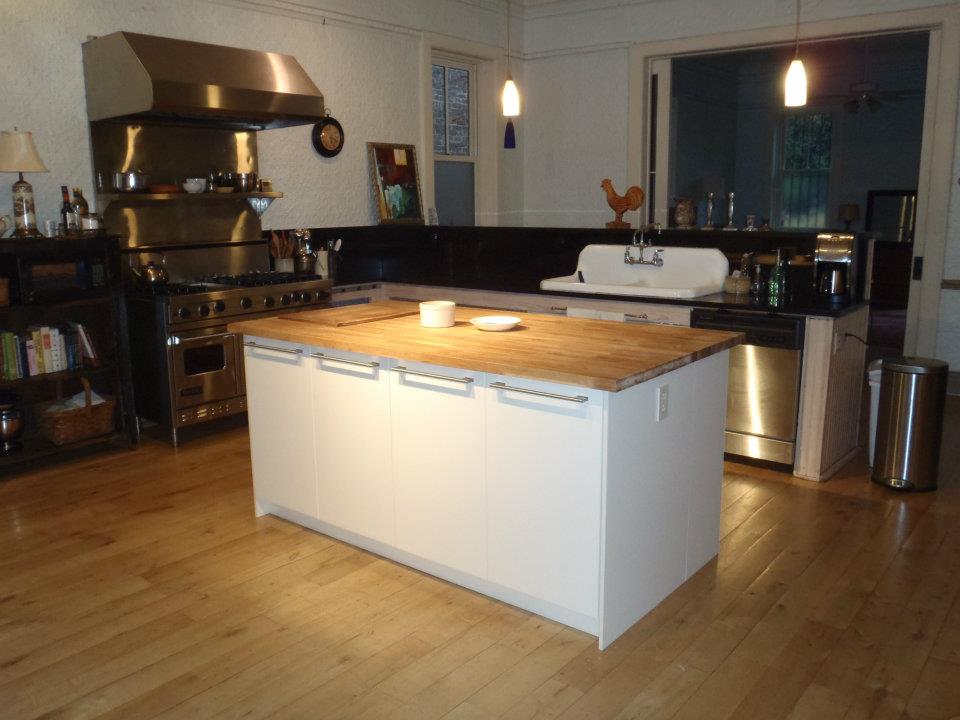
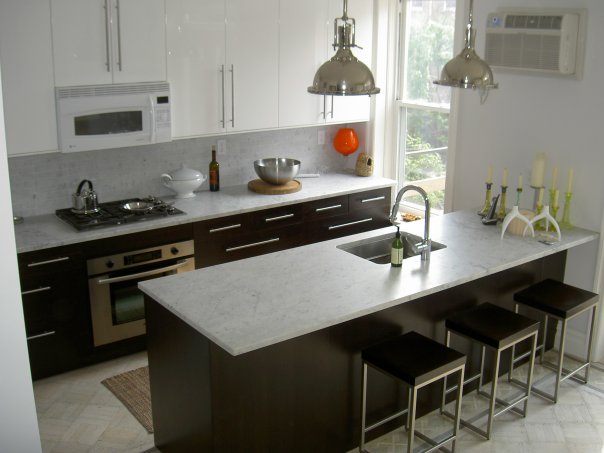
1. Butcher-block on an island gives the perfect pop to a contemporary kitchen. You can prepare food right on the counter if you wish. Use a cutting board if you’d like to preserve the look of the counters.
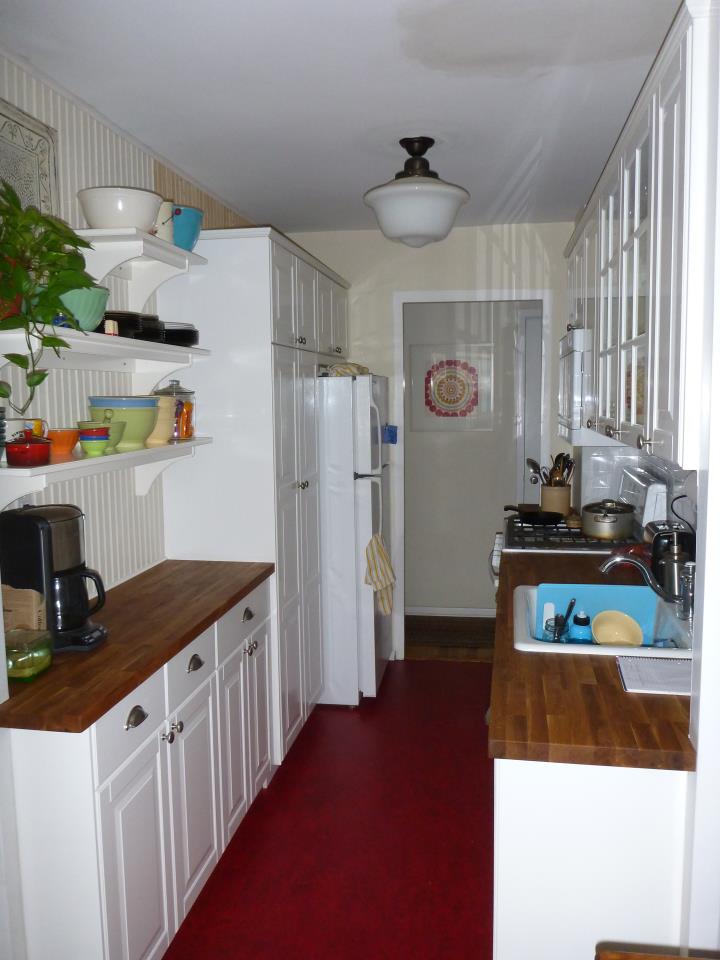
2. Wood counters can also look very vintage when styled that way! The team used a darker wood to match the overall aesthetic of the kitchen.
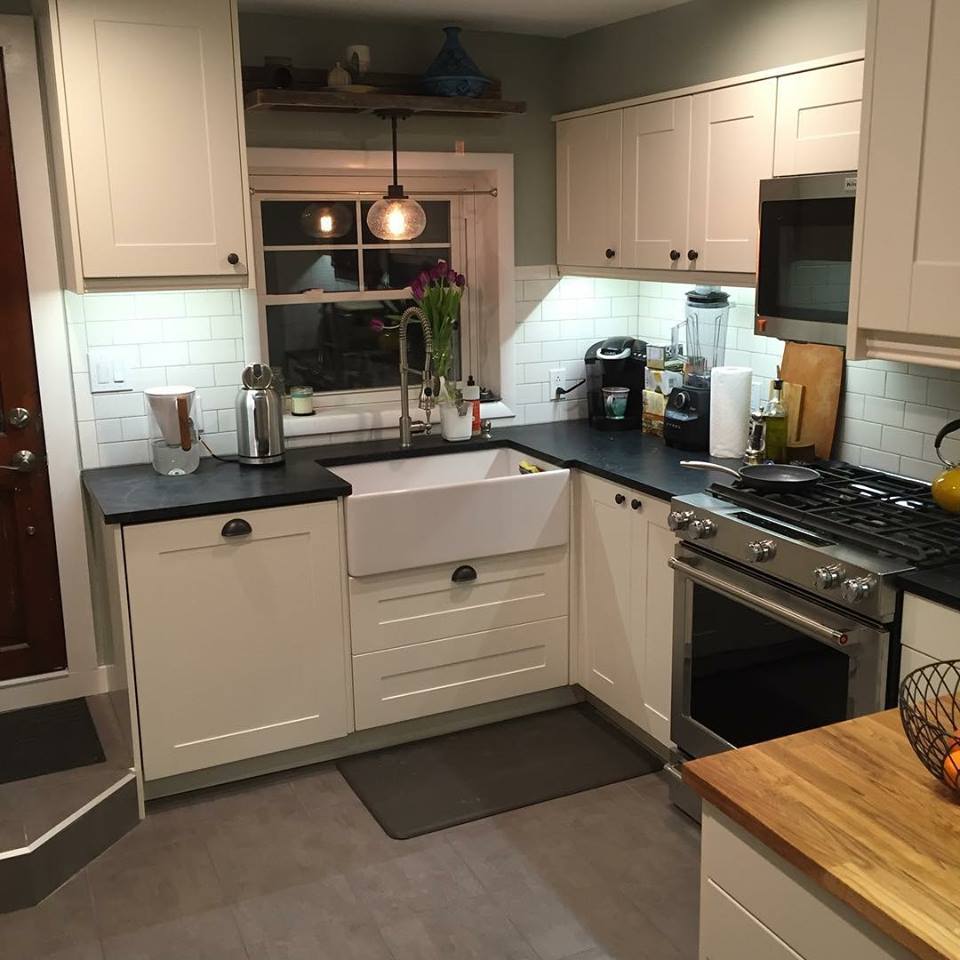
3. You can even mix-and-match styles! Basic Builders creatively paired soapstone and wood (below) for a more modern look. Wood also looks fantastic paired with quartz or marble.
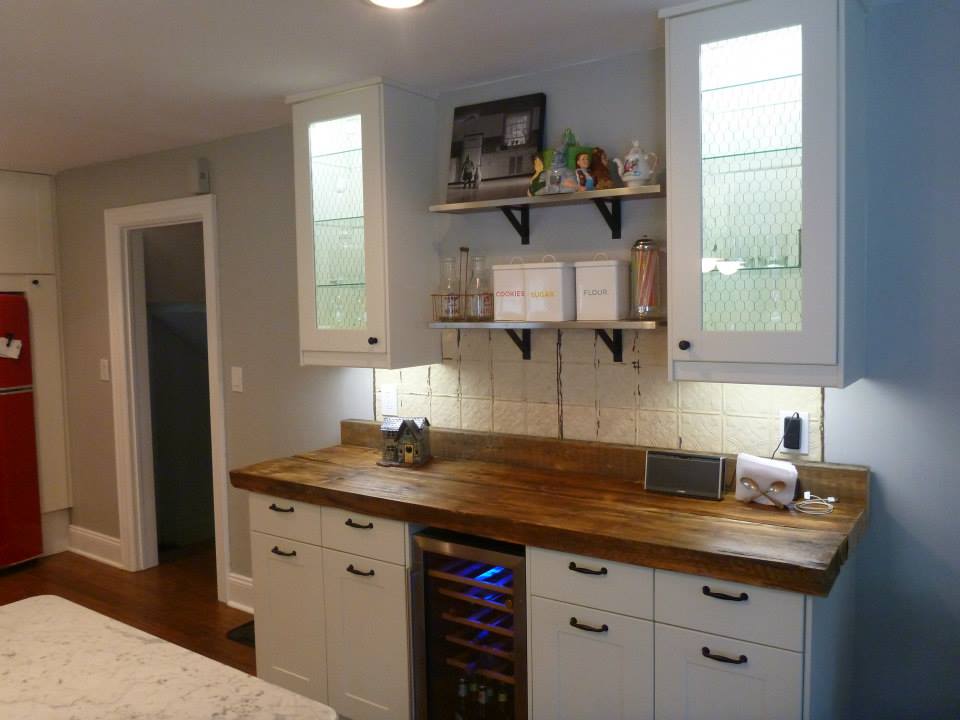
4. Lastly, they decided to craft reclaimed wood into a durable counter! Its natural feel gives a warm glow to the whole room. As an added bonus, it’s also very eco-friendly and affordable! Who knew that natural wood made such a nice addition?
Have any questions? Pop a comment down below and one of our kitchen experts will help you out!
When your kitchen is clean and organized, you feel like you can finally breathe. Here are 6 creative ways to solve your storage problems using real IKEA products.
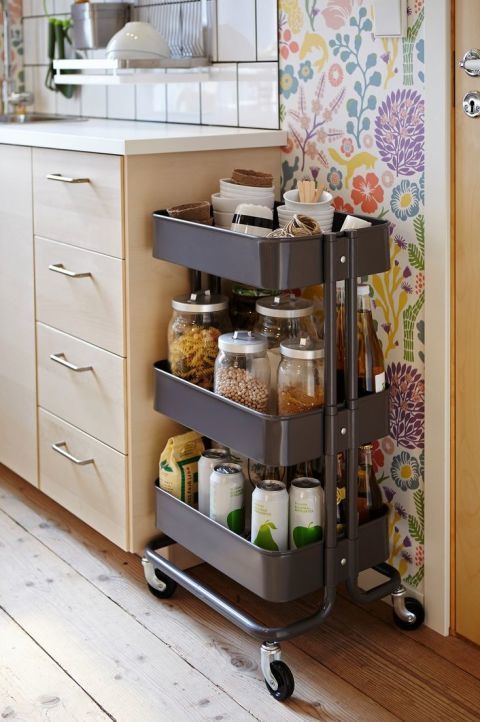
1. RASKOG Rolling Cart
Small rolling carts can be used to group small items and extra pantry items together. What’s special about the RASKOG cart from IKEA is that it can roll into small spaces, therefore maximizing kitchen storage space. It is also surprisingly sturdy for its size.
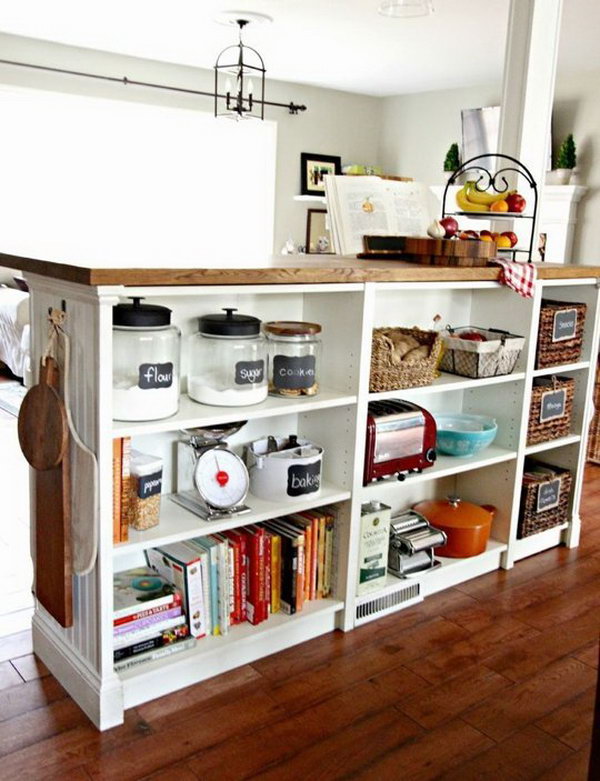
Using this bookcase, you can create a DIY kitchen island perfect for storing your favorite cookbooks, snacks, and other supplies. Add extra Billy bookcases in the kitchen as shelf storage for anything else you may want easy access to.
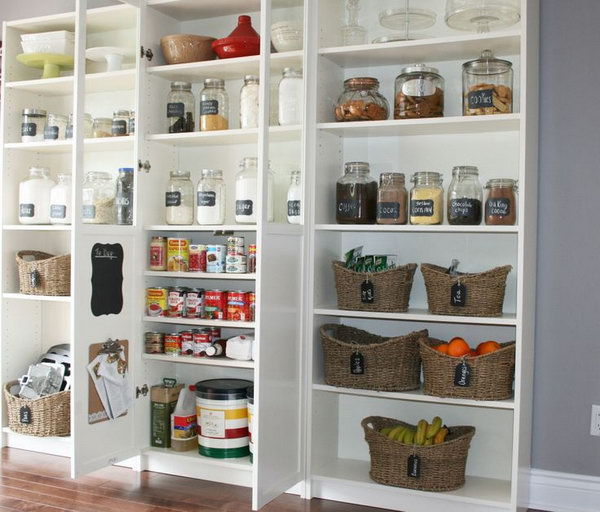
When you ask us to renovate your kitchen, we can custom build the cabinets you want. Cabinets can even be doubled up as a credenza for displaying your finest china and silverware.
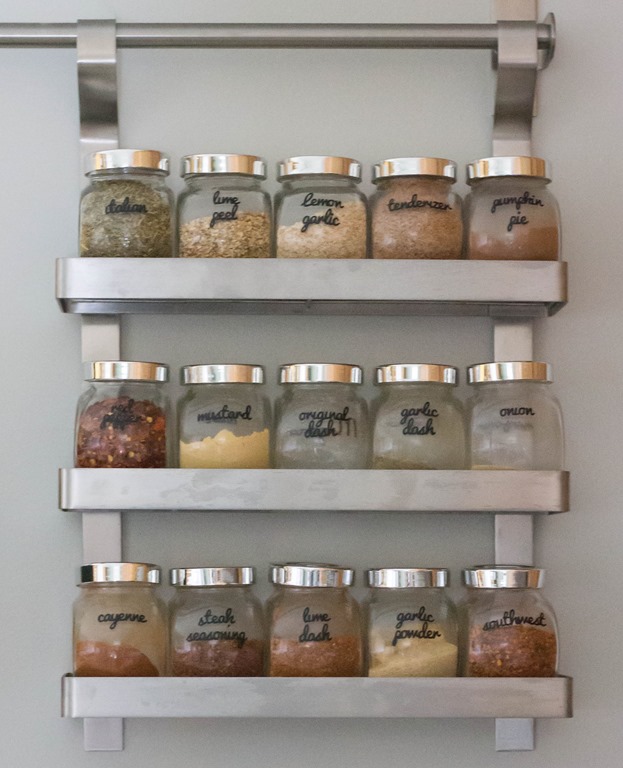
IKEA MOSLANDA picture ledges can be both spice holders and art displays. If you want the ledges to look even more organized and beautiful, place RAJTAN jars in them. Just make sure the sizing is right before you buy.
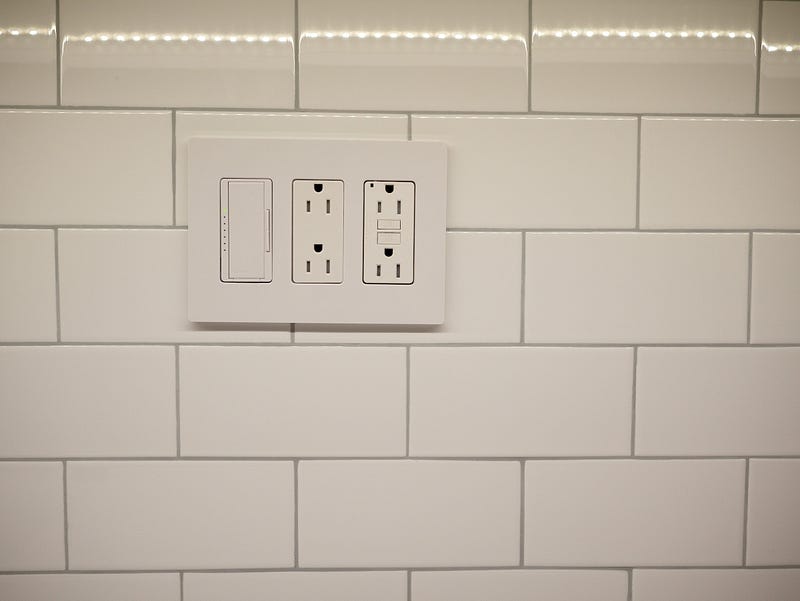
It’s important to organize utensils by function. GRUNDTAL pieces from IKEA can be combined to utilize backsplash space with this unique utensil holder.
It’s smart to store your cookware in one organized drawers so that you don’t have to spend time looking for it anymore. Sektion pullout drawers are perfect for storing cookware and utensils easily. If you invite us to makeover your kitchen, we can customize the drawers to fit your specific needs.
Which solution was the best? Let us know in the comments down below! If you would like an IKEA kitchen of your dreams, contact us while there are still open spots. The IKEA sale (up to 20% off) is going on NOW, so don’t wait until it’s too late.
A kitchen is more than just a part of your living space. It is the first thing you see when you make breakfast in the morning. It can determine your mood for the whole day! If you’ve ever felt cluttered, cramped, or just bored by your kitchen, then maybe it’s time for something new. Here are a few kitchen design tips to help you boost your energy, productivity, and happiness.
1. Design wide walkways
One of the most important parts to think about when renovating is the walk space. Will multiple chefs be cooking in the kitchen, or will it be just you? Kitchens typically have 42 inches of space for a one-person kitchen, and at least 48 inches for a two-person kitchen. Aside from the cooking space, walkways should be at least 36 inches wide.
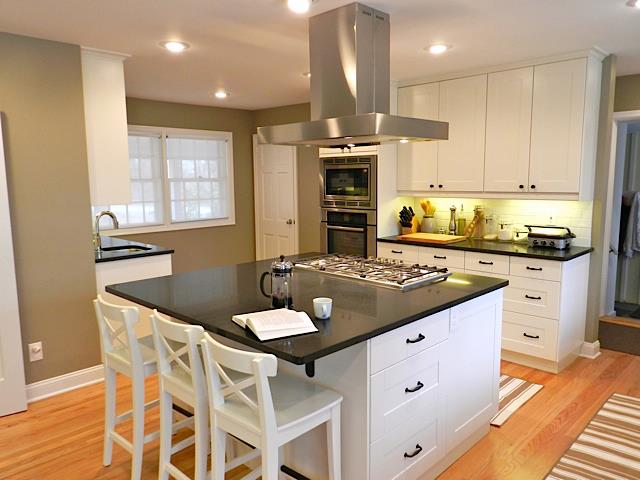
2. Add an island for efficient prep space
Feeling cramped when using your kitchen counters for prep space? Add an island to efficiently prep for meals without feeling cluttered. Make sure to purchase a large island if it will be used for both cooking and eating. That way, you can keep the area safe for people to eat at while you cook.
3. Maximize storage space
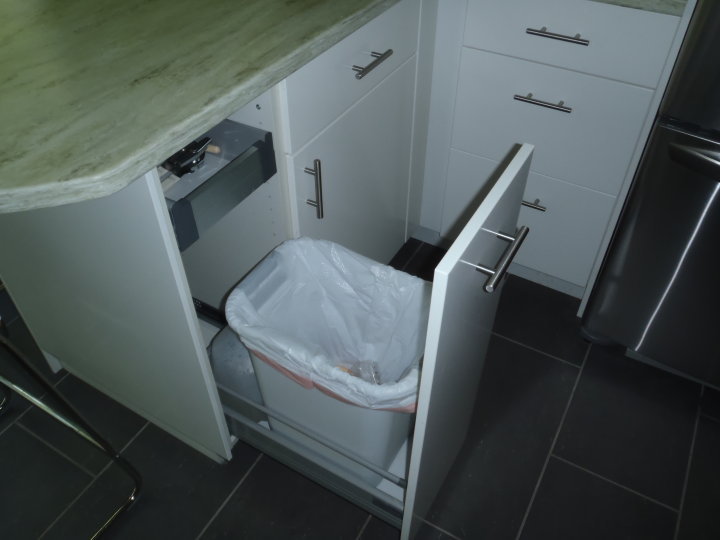
Even if you have a small kitchen, the way you use the space will really make a difference. Use pullout drawers for storage and garbage can space, and store dishes on a rack by the dishwasher so they’ll be ready to go when it’s time to wash. Assign your cabinets to specific products so that you know exactly where to look for that one favorite mug. You can also hide appliances such as a toaster and blender in an appliance garage to make more space on countertops. Make use of the space above your refrigerator by installing cabinets or a display shelf.
4. Pick the right wall color
Determine what mood you want your kitchen to convey and plan the color accordingly. For small kitchens, always plan to use bright colors and lights to make the space look even bigger. The color you pick will determine the mood of your kitchen. Pick colors like beige, gray, and white for a sophisticated look. Pick colors like yellow, orange, and blue for an energetic, bright atmosphere.
5. Pick a good backsplash
If you don’t want to bring too much attention to the walls, pick a vibrant backsplash instead. Not only will it keep your walls from getting stained by splashes from the counter, but it’ll look great, too. Make sure the tile goes with your overall color scheme. Use a neutral backsplash if your walls are already a bright color so that it isn’t overwhelming.
6. Add a pop of color
A color pop is always a nice touch. You can match the kitchen appliances to the walls, and keep the rest neutral. For an effective color pop, it is important to only display a few items of that color to avoid feeling overwhelmed in your kitchen.
Want your kitchen to last? Then you’re looking in the right place. We perfect every detail the first time around, so that you will have to do less work later. Our quality kitchens last an estimated 20 years or more.
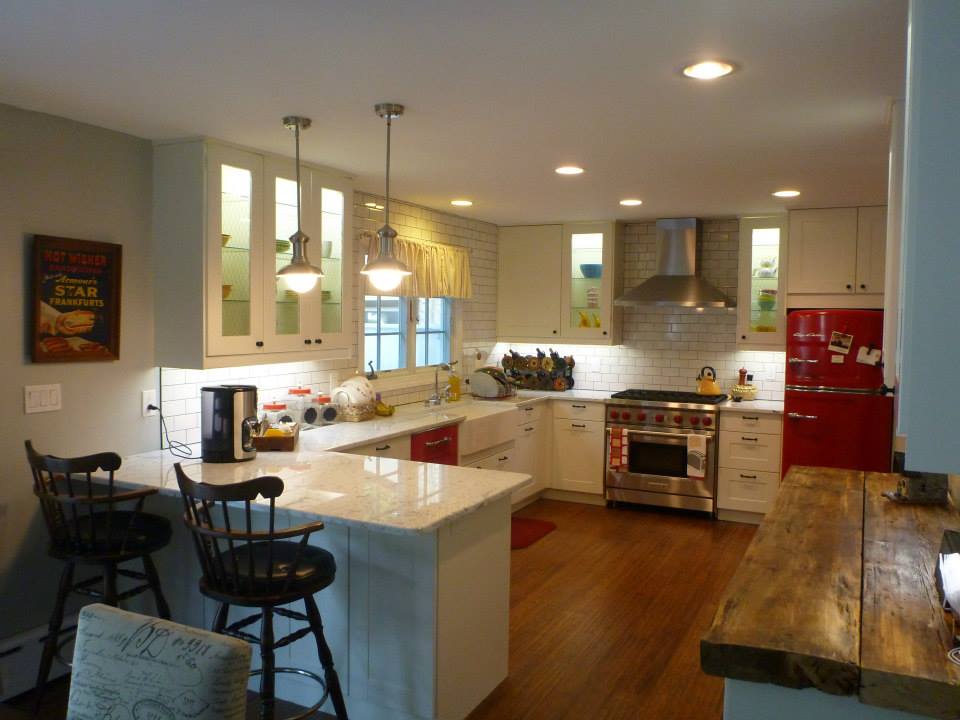
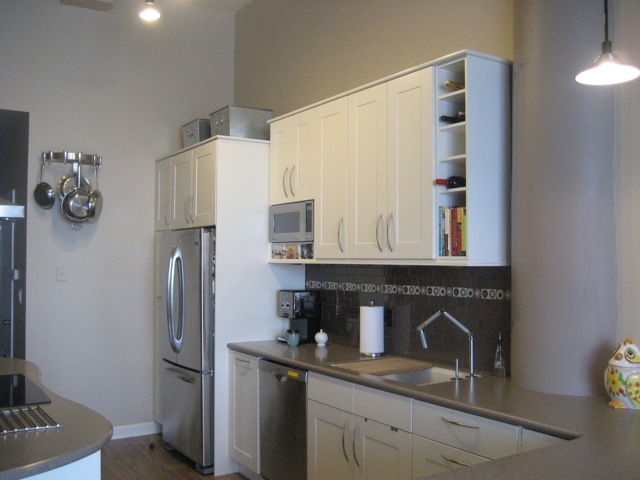
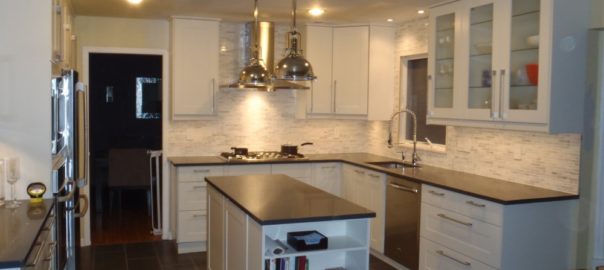
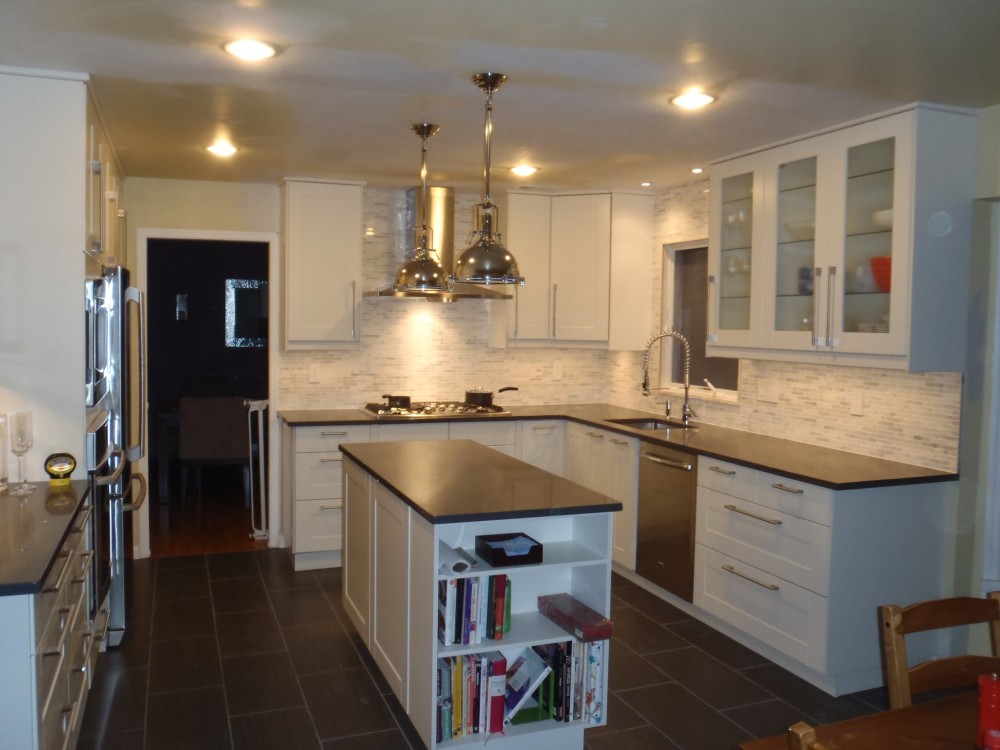
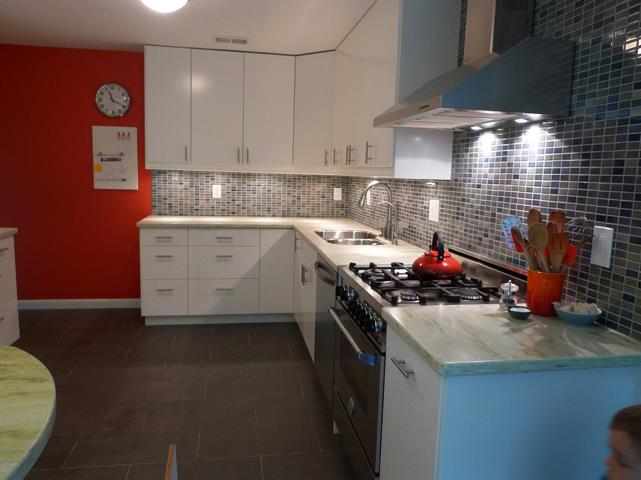
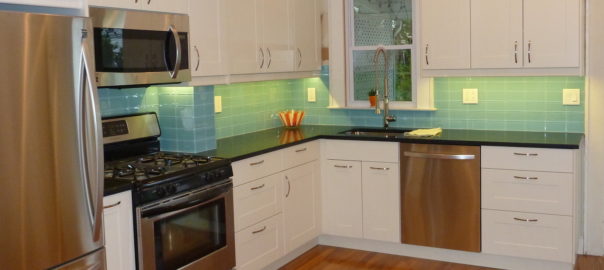
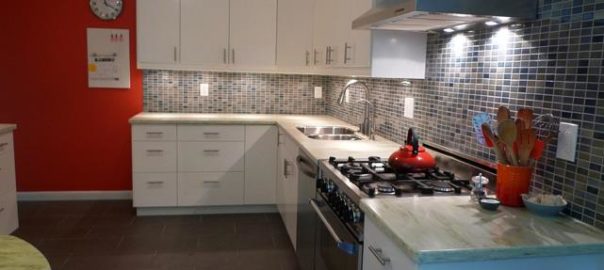
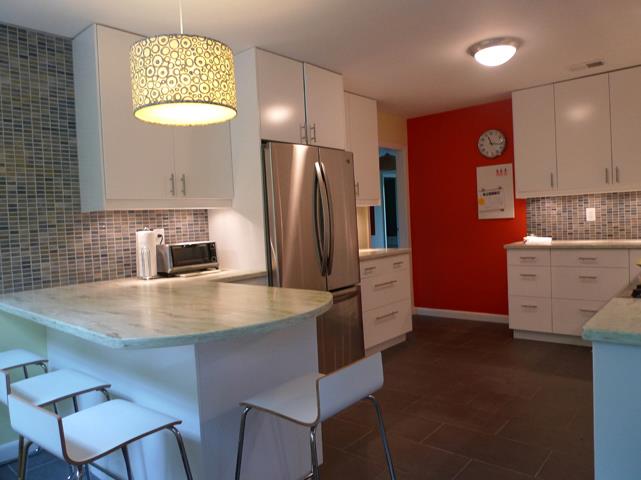
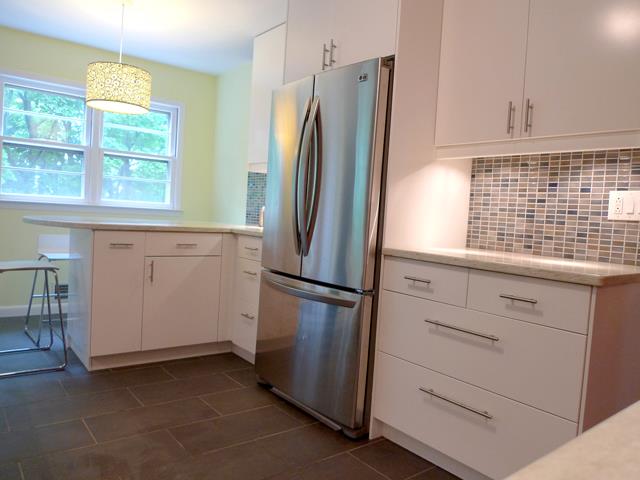
Could you picture yourself in this kitchen? Here’s a little about what we did to achieve this look. Notice how bright and open the space looks, an illusion created by the white Matte Doors from IKEA. For a bold color pop, we painted one wall red. We purchased red kitchenware as well, to draw even more attention to the color scheme. Including under-cabinet lighting also creates an illusion of a bright, open room. And of course, who wouldn’t want a stainless steel refrigerator? For those who have them, this kitchen is also spacious enough to handle the constant movement of multiple chefs. For those who don’t, there is even more space! It is a win-win on this one. If you would like to have a kitchen like this of your own, please contact us! It will be our pleasure to serve you.
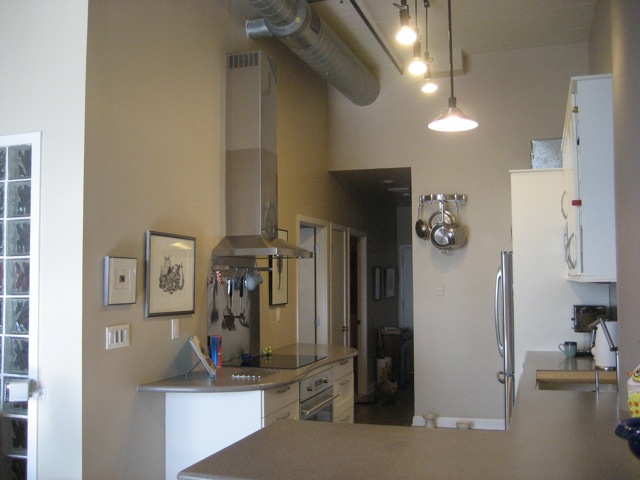
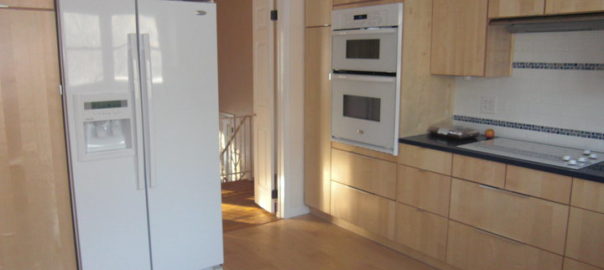
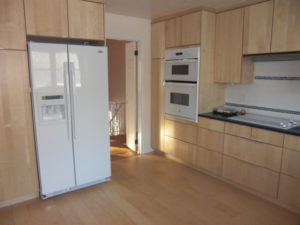
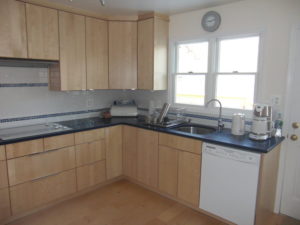
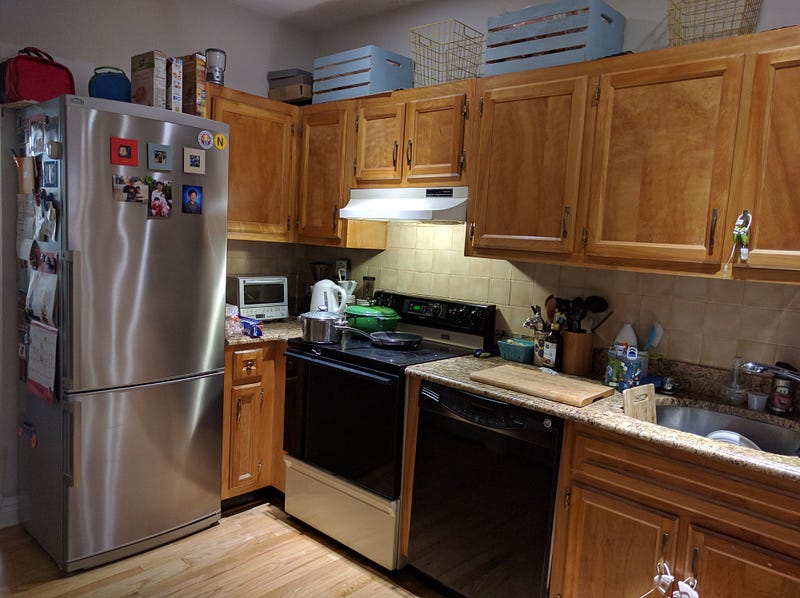
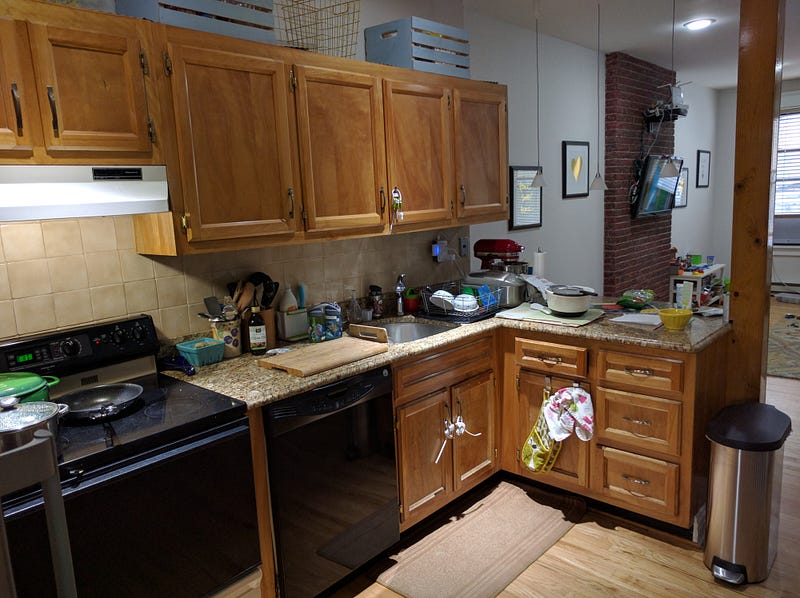
We purchased our two bedroom duplex condo in Hoboken, New Jersey in January 2014. It was pretty much exactly what we were looking for in terms of layout and value. I’m not a huge fan of buying brand new or newly renovated homes. That means the home is going to be priced close to its maximum market value and there won’t be as much upside to doing any work on it. On the other hand, I also don’t have the financial and logistical flexibility to deal with fixer uppers.The one area of our home in which we knew we could add immediate value was the kitchen. There was nothing seriously wrong from a functional perspective but it clearly looked dated (was probably around 30 years old, including the appliances).
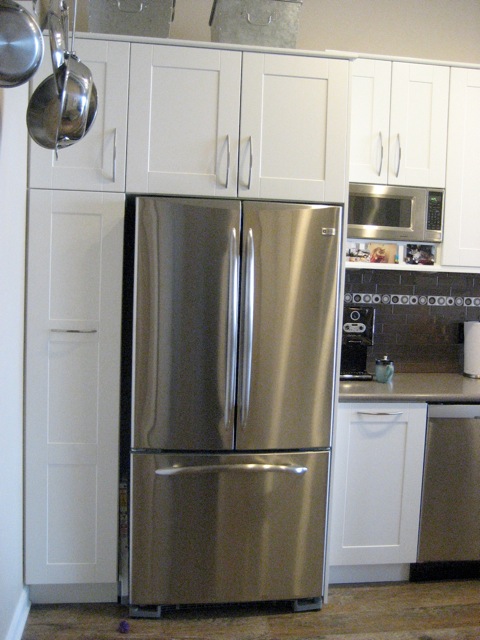
Ok, so actually the fridge was new. The fridge that came with the home died a few months after we moved in and this was literally the only model we could find that fit into the small space. There were some areas that could have used improvement functionally.
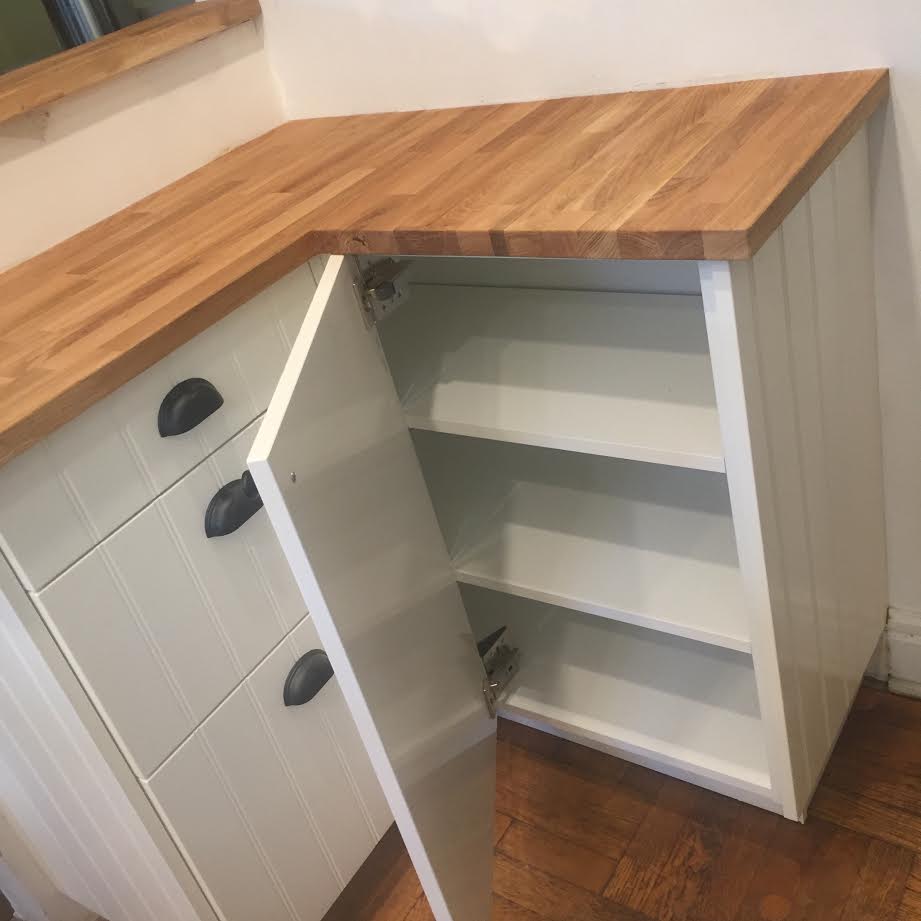
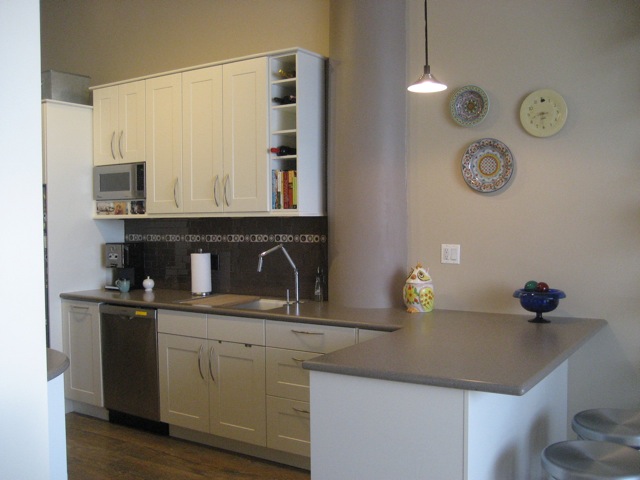
The corner cabinets were generally useless, especially the corner base cabinet in the photo above.
The wall cabinets were 30″ tall. There was room for taller cabinets and it’s always nice to have more storage space.
Also, people always say updating the kitchen and bathroom have the biggest impact on improving the value of a home. It took us about three years to save up enough money to feel comfortable taking on the project so in the fall of 2016, we decided to start looking for a contractor to do the project.
We considered three different options:
1) An interior designer / cabinet reseller based in Hoboken. She would have been able to provide us with great quality cabinets plus offer some ideas to help us make the most of the space but we would have had to hire a contractor separately. I ideally wanted one provider to handle everything so unfortunately this wasn’t going to work for us.
2) A full service contracting company that would have done everything for us. They seemed like honest people who offered a quote of around $35,000 for everything outside of the oven and dishwasher.
3) An IKEA cabinet installer who was also capable of doing minor work typically involved in kitchen renovations: plumbing, electrical, drywall, etc. Their initial proposal was for about $11,000 but didn’t include cabinets, appliances, sink, faucet, etc.
We ended up going with the IKEA cabinet installer, Basic Builders from Jersey City, New Jersey. There were a few reasons why I felt most comfortable going with that option:
I was perfectly happy to go with IKEA cabinets. From reading various blogs, people seem to generally be pleased with the quality of their cabinets. We wanted to save money where we could and the cabinets were an area where we didn’t have strong preferences.
They’re a small operation of a husband/wife team, both of whom are RPI graduates with engineering degrees. As someone who went to a engineering-focused university myself, this was something that appealed to me.
They had great reviews on Houzz and Yelp.
The onsite design consultation
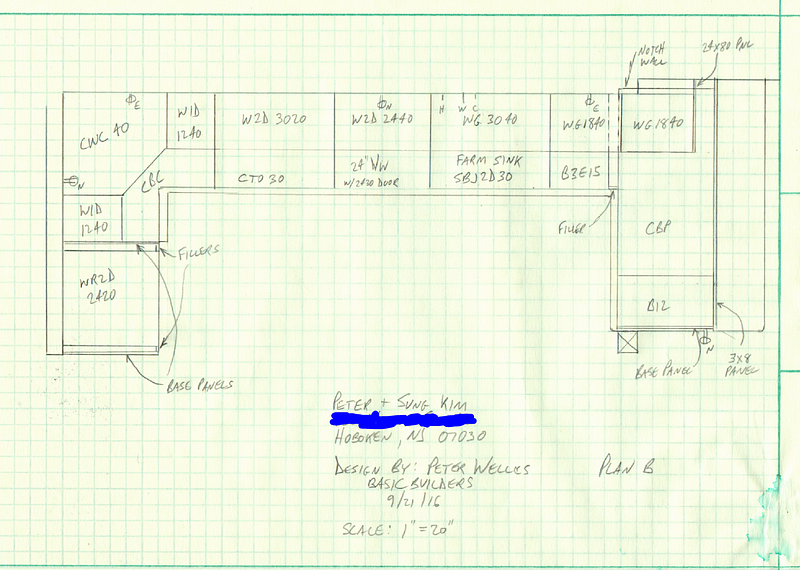
Peter visited our home in mid-September to take measurements and offer some design advice. We were a little bit concerned we’d have to do some minor cabinet customization to come up with a design that worked but fortunately IKEA offers enough variety in their cabinet sizes where that wasn’t necessary. Peter knew all the various cabinet sizes by memory and was able to draw up a sketch pretty quickly. I made the mistake of not telling him that we wanted a front apron farmhouse sink until he was halfway through drawing the sketch. I didn’t realize it would impact the design, so he had to start over to accommodate that.
Note that this was labeled “PLAN B”; “PLAN A” was the version w/o the farmhouse sink. 🙂
There wasn’t a lot of flexibility in the space to do anything wildly different; the only major decisions we had to make regarding our design were:
Go with 40″ tall cabinets or stack 30″ and 20″ cabinets. The stacked cabinets would have given us the most storage space but it would have cost more. Even with the 40″ cabinets, we were going to gain quite a bit more storage so we decided to go with that.
Keep the same kitchen length or extend it out. The full service contractor made it seem like extending the kitchen would have cost a lot more money but when we proposed it to Peter, he said it wouldn’t have that much of an impact on cost, so we decided to extend the kitchen out into our living room space by about a foot.
Within a few days, Peter finalized the design and worked with his wife Lissa to create a proposal and cost estimate. We were already sold just from the time we’d already spent with Peter and were happy to choose Basic Builders to do our kitchen renovation.
Cabinets
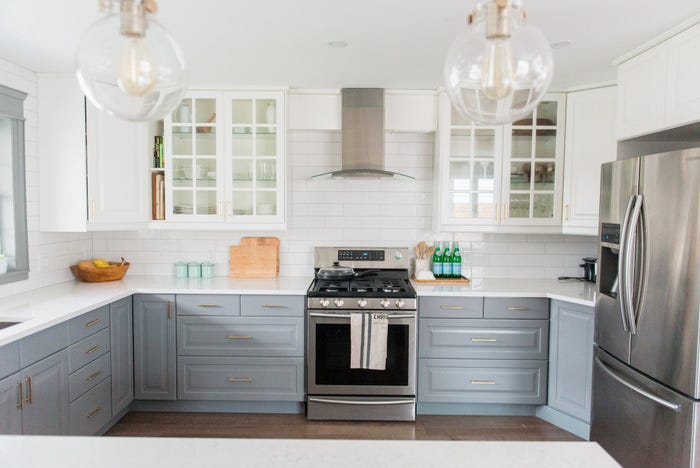
Lissa provided us with a start date of late October. At this point, we only had a few weeks to start making some decisions about cabinets, appliances, etc. The wife and I were generally on the same page about the style of cabinets we wanted. We live in an old rowhouse and it didn’t really make sense to go super-modern. We agreed a more traditional look would better match the look of the rest of our home.
We agreed on going with the BODBYN style but I wanted to do a two-tone kitchen with white on top and gray on bottom, whereas the wife wanted it all gray.
I let the wife win this one and agreed to go all gray. There was going to be plenty of white elsewhere in the subway tile backsplash and quartz countertop.
Major appliances
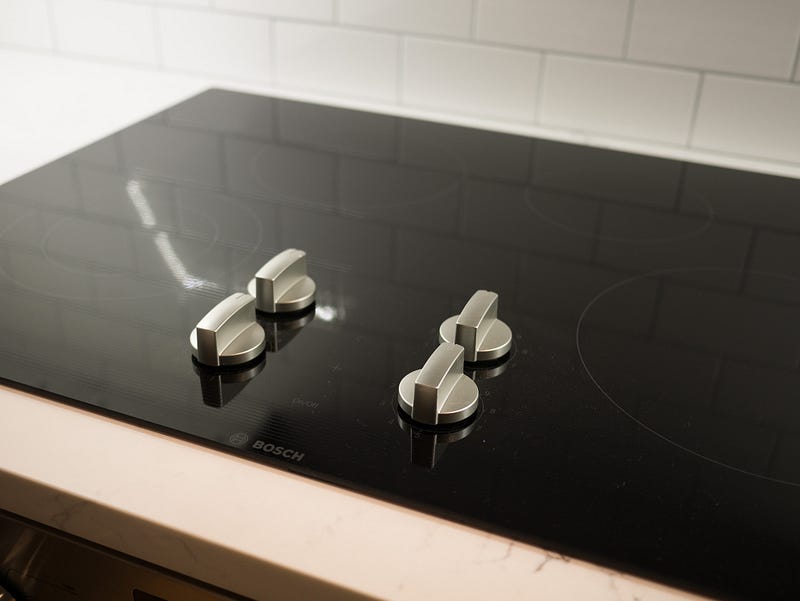
I wrongly assumed that appliances were readily available and could be acquired within days. Come on, we live in a time when I can go on my phone to order almost anything from Amazon.com and have it arrive on the same day, or at worst, next day. I painfully discovered that all the appliances that I had been carefully researching would not be available from Home Depot, Best Buy, Lowe’s, etc. for until weeks after the planned start date. While this severely constrained the options we had for appliances, I was able to find some highly rated Bosch appliances from Lowe’s that would be delivered just in time. Bosch and Lowe’s also happened to be doing an awesome rebate promo where I would save a few hundred dollars. Score!
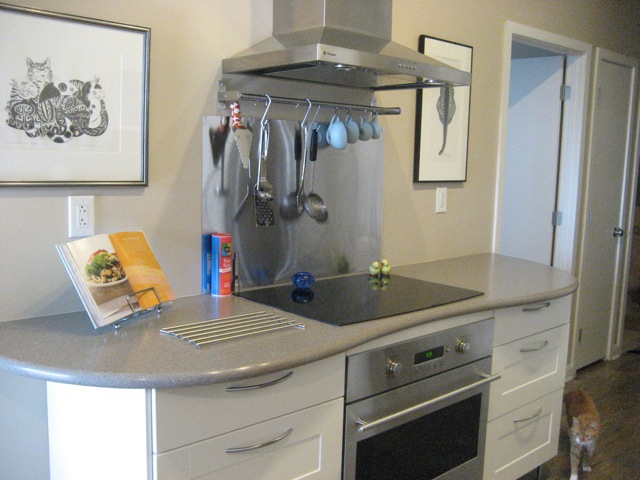
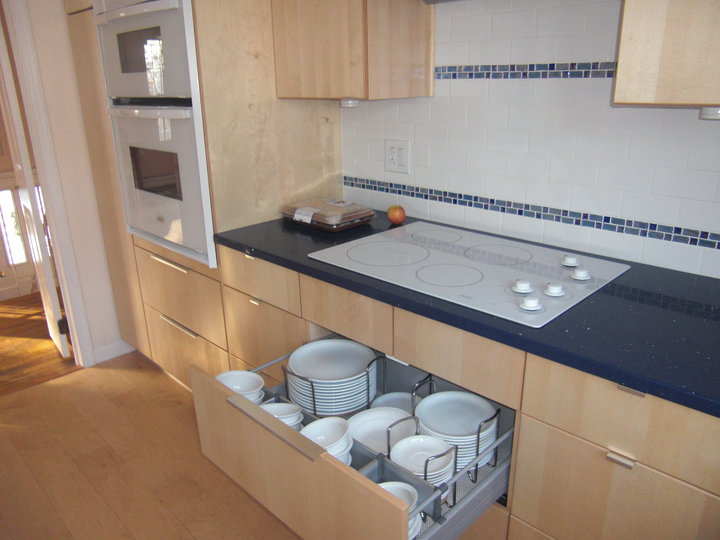
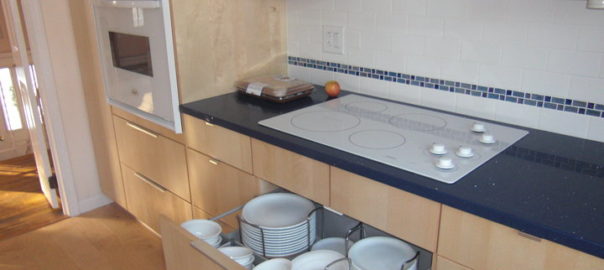
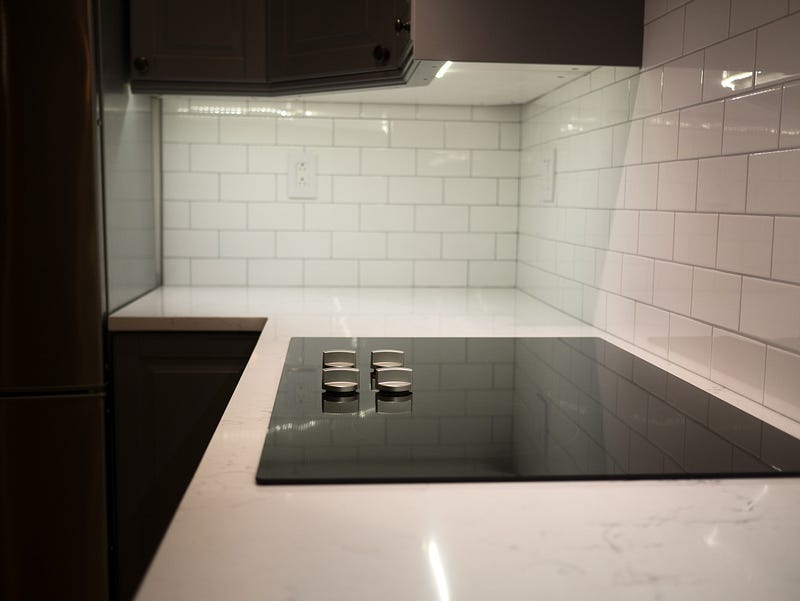
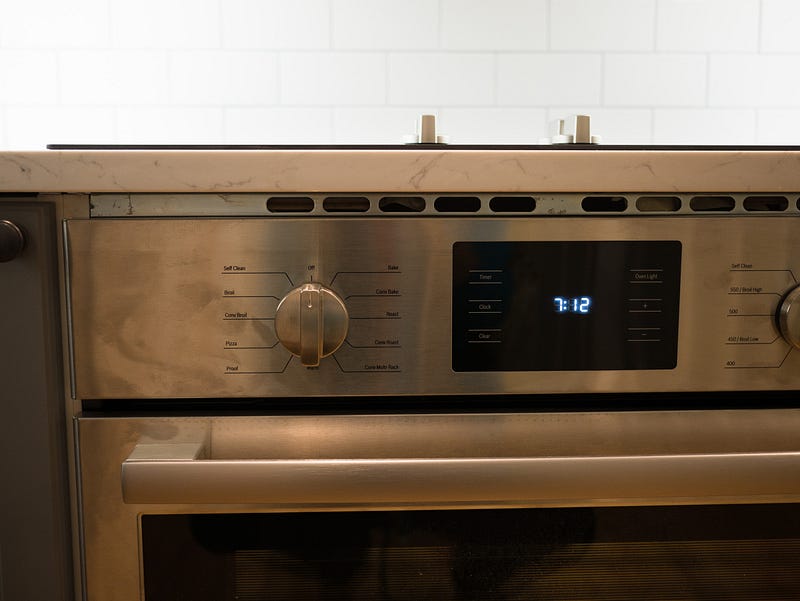
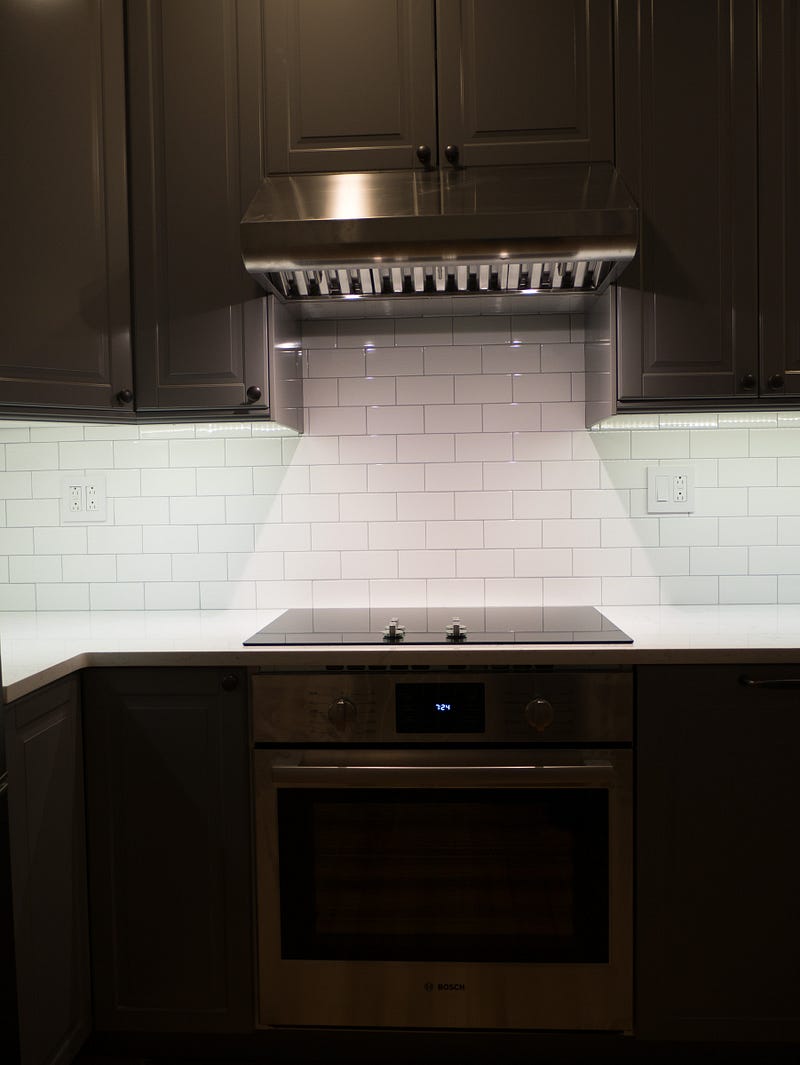
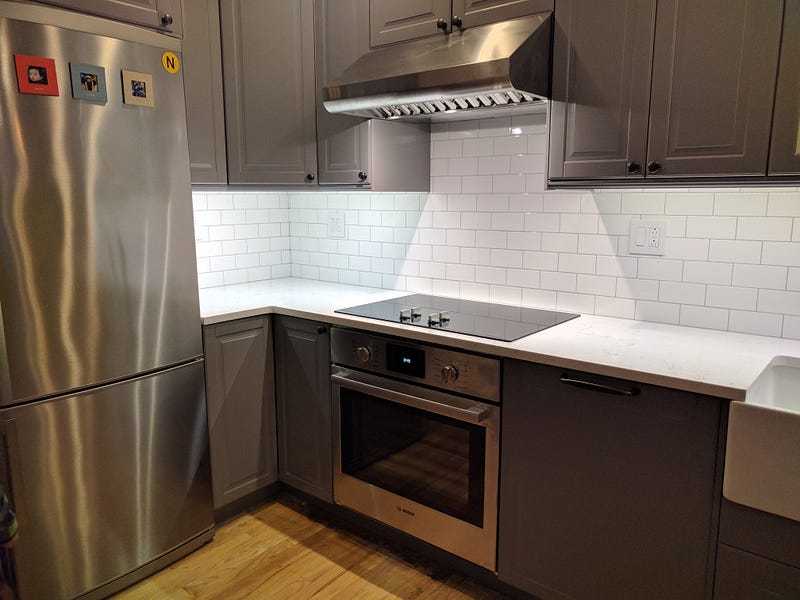
I really wanted a separate cook top and oven. I knew I could get the same functionality at a much lower price in a freestanding range but I loved the idea of having the counter top extend all the way through the kitchen within the break at the range.
The other thing we sacrifice with the cook top over oven setup is the option of an induction cook top. Not sure if there’s some safety issue with having the electrical components for the induction cook top over the oven or just not enough space, but it’s just not a configuration that’s available.
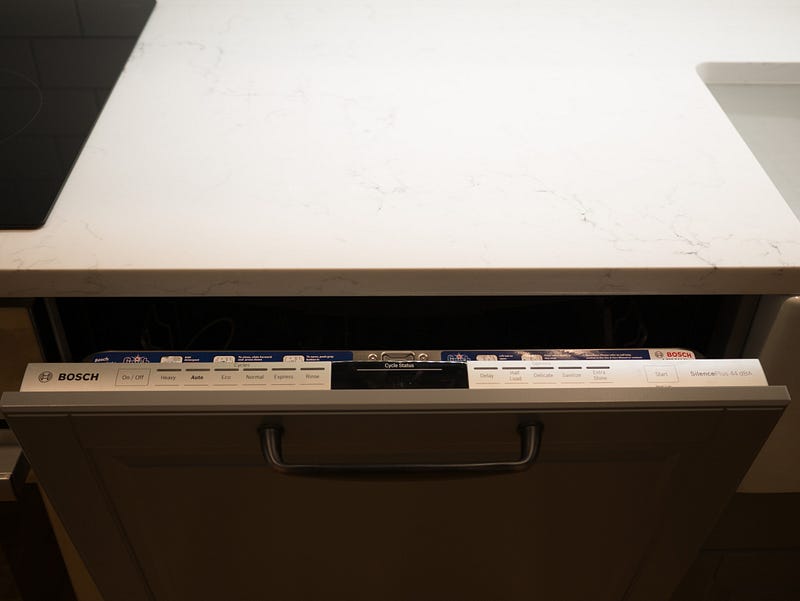
I also really wanted a dishwasher with the ability to attach a door front that matches the cabinets.
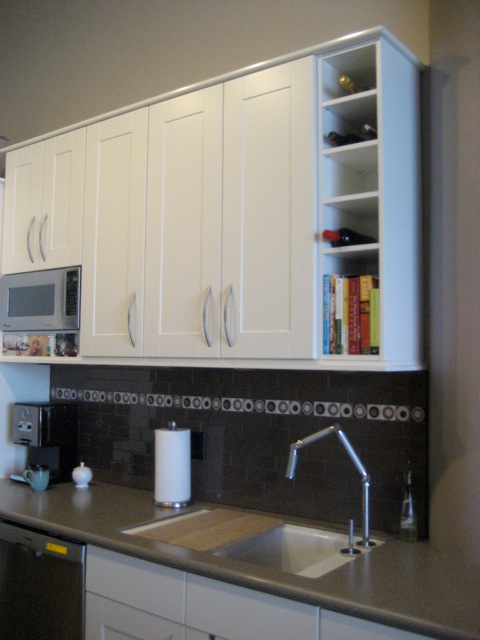
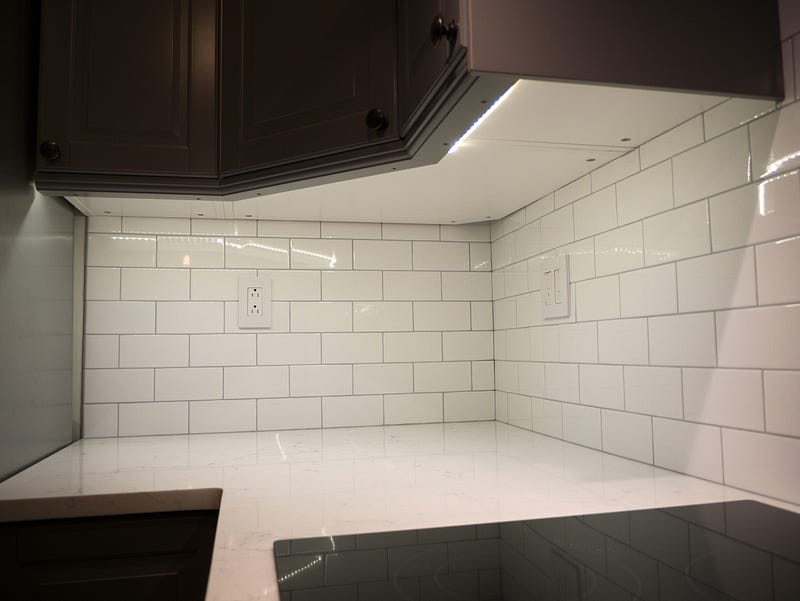
We both agreed to go with a simple white subway tile backsplash. We debated dark gray vs light gray grout. I bought light gray grout but it turned out to be more of a medium gray. Anyway, it was just right.
You might be surprised that even with simple white subway tile, you could spend a lot of money if you really wanted to. The basic white subway tile from Home Depot would have run about $125 for our kitchen. I bought tile from a brand called Jeffrey Court that cost $200. The Jeffrey Court tile was about twice as thick as the basic stuff (I don’t even know if thickness really matters?). If you want an authentic reproduction of early 20th century subway tile, you can get it from here and spend $1000 for it, but to be honest, I didn’t think it was worth it.
Tile: Jeffrey Court Allegro White 3 in. x 6 in. Ceramic Wall Tile
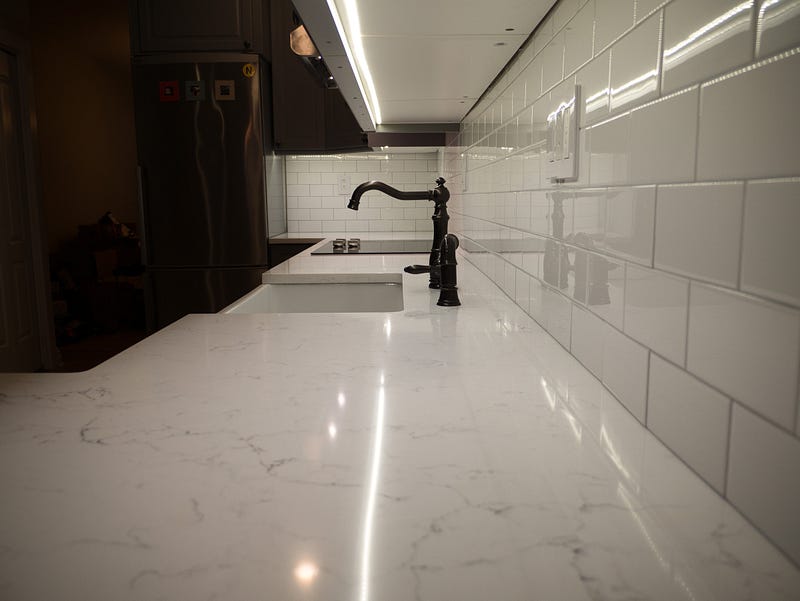
You can drive yourself crazy looking at dozens of samples of countertops. It’s so hard to get a sense for what a stone will look like just from a sample. It’s also hard to know just by looking at photos because lighting and photo white balance can totally change what the color of the countertop looks like. In the end, don’t get too hung up on being too particular about a specific color or pattern.
We decided on quartz because it seemed to be the lowest maintenance stone and I’m all about low maintenance. I didn’t really care if it “lacked character”. We also wanted something that looked kinda like marble. Every quartz manufacturer offers numerous “faux marble” patterns.
Every quartz fabricator I talked to says there’s basically no difference in quality between various brands. Just find the color / pattern that seems acceptable and go with that. I don’t know how true that is but that seems to be the consensus. The brands in particular that seem to be overpriced are Cambria (paying a premium because it’s made in the US), Caeserstone, and Silestone.
We went with PentalQuartz because it was significantly cheaper than the brands listed above and they offered a pattern that seemed nice.
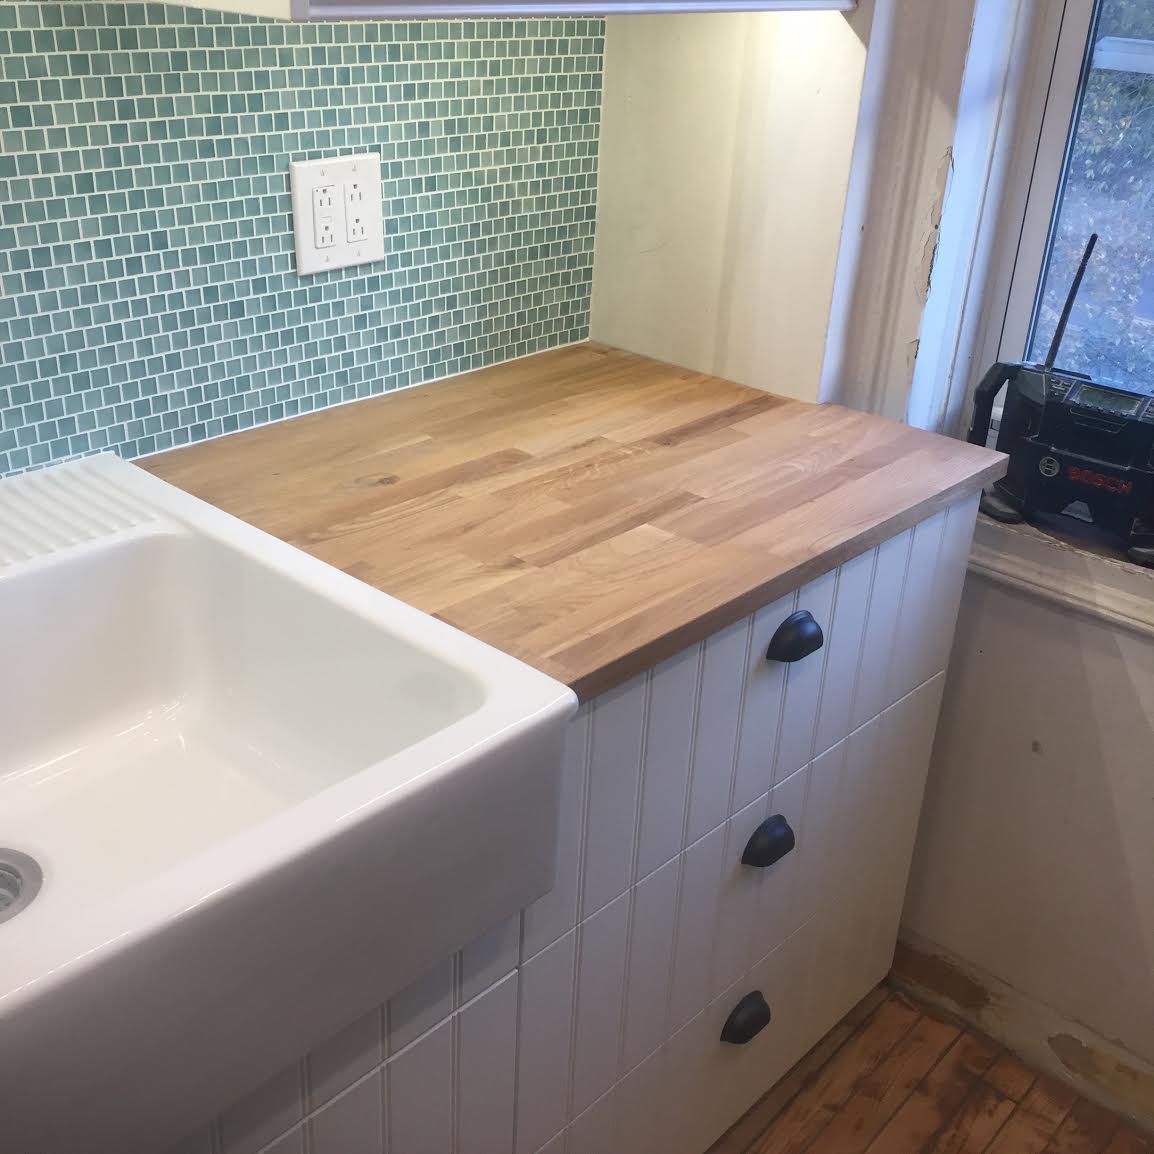
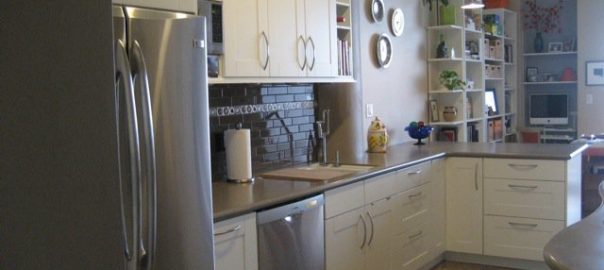
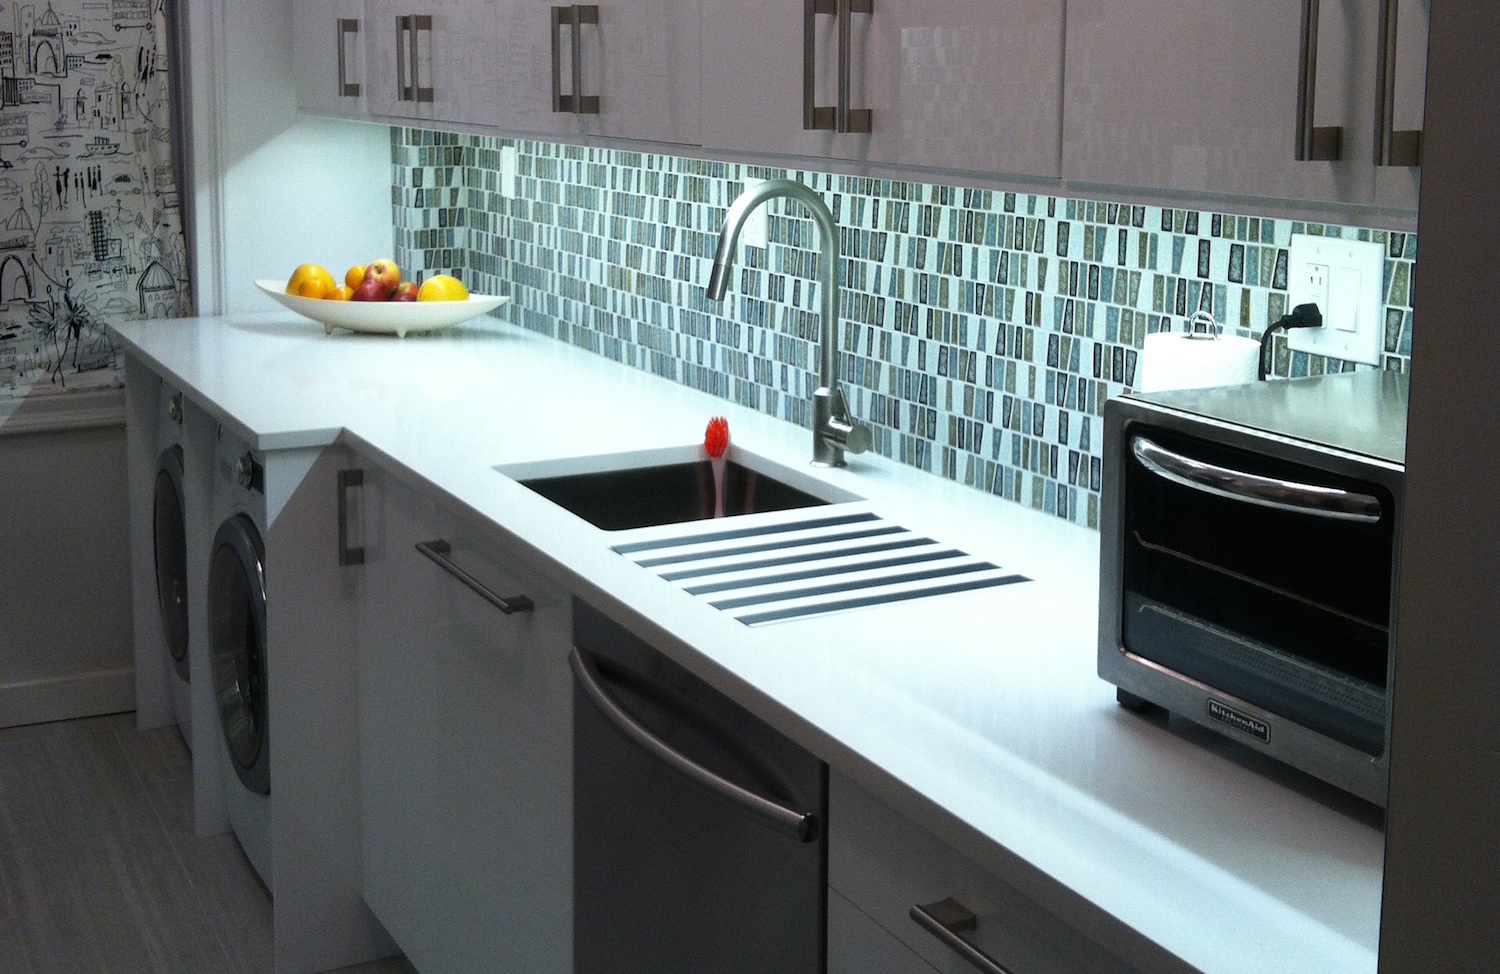
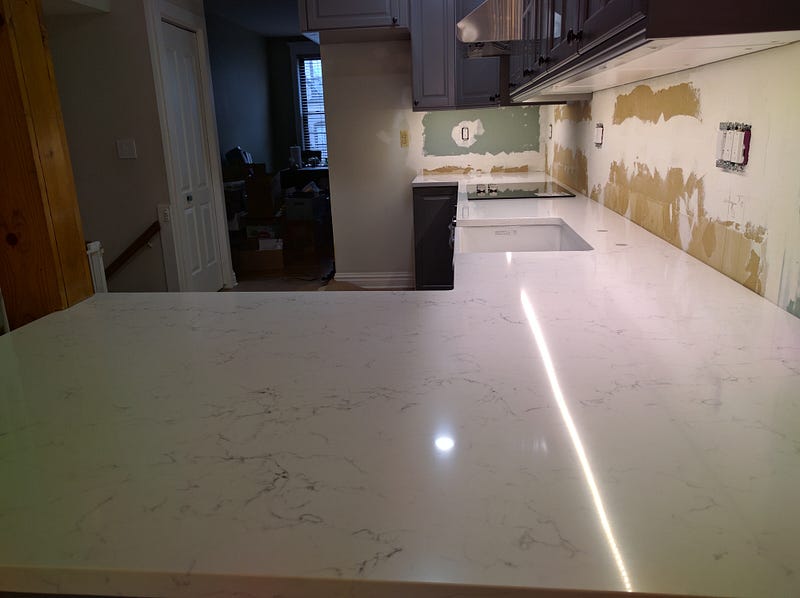
Just after installation
The counter top was the most painful part of the kitchen renovation. I had decided on the PentalQuartz Misterio fairly early on. I sent my deposit into the fabricator, assuming it’d be all ready to go when the cabinets were set. I got a call a day before Peter was about to finish the cabinets that there’d be a 2–3 week delay in getting the slab! 🙁 We were also not 100% sure that one jumbo slab would be enough because there was a disconnect between the PentalQuartz and the distributor’s websites on the exact dimensions of the slab.
Anyway, the slab finally arrived (after 2–3 more weeks of eating take out / delivery food) and fortunately it was just the right size (the PentalQuartz website had the correct dimensions) and it was beautiful.
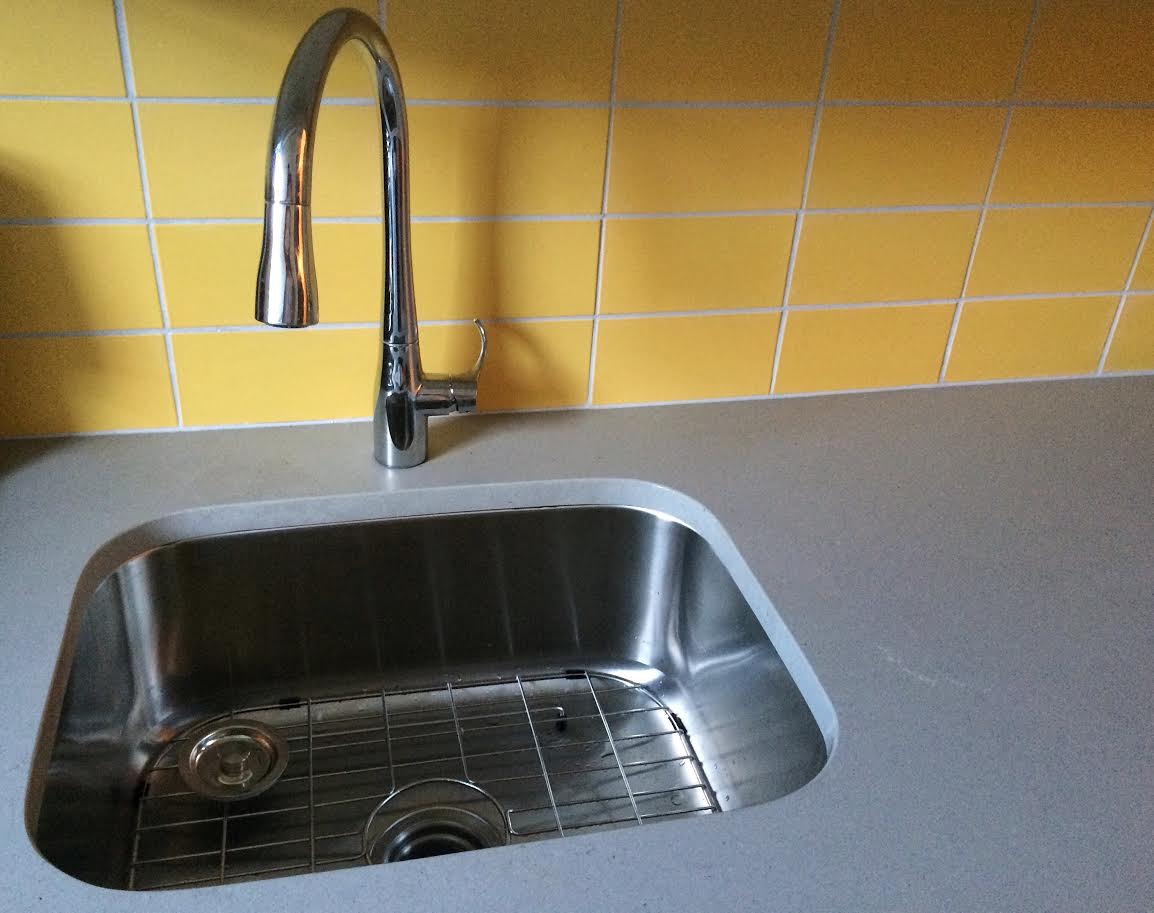
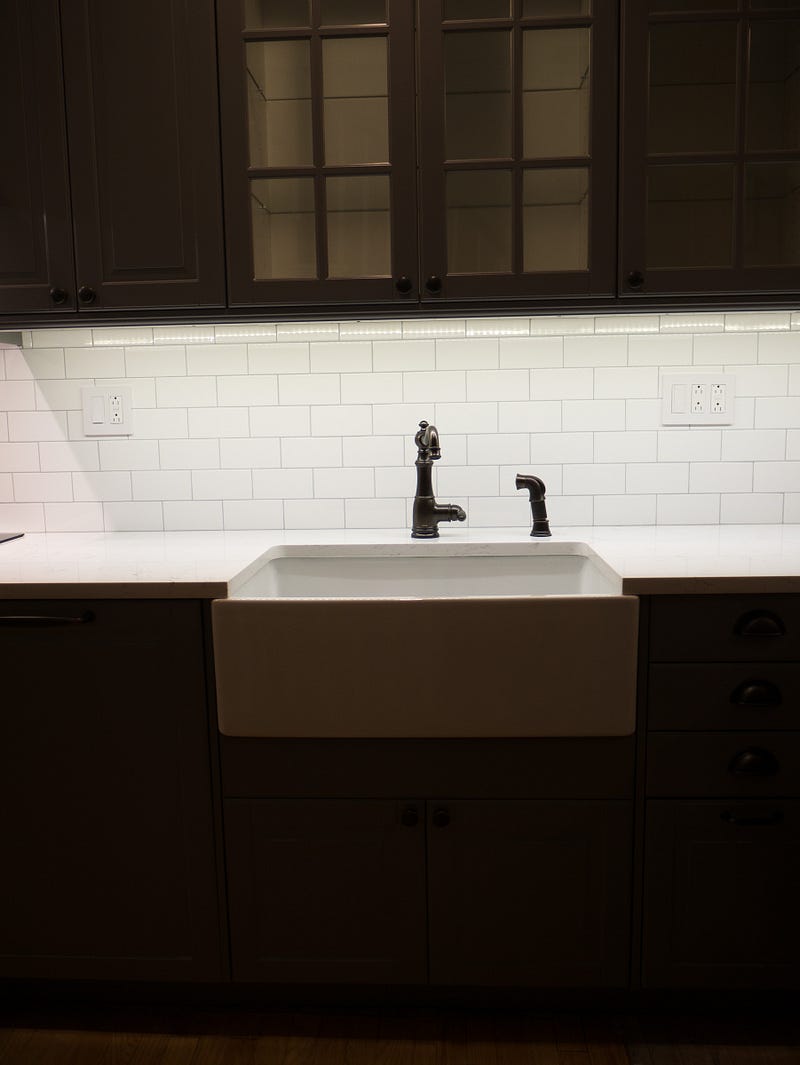
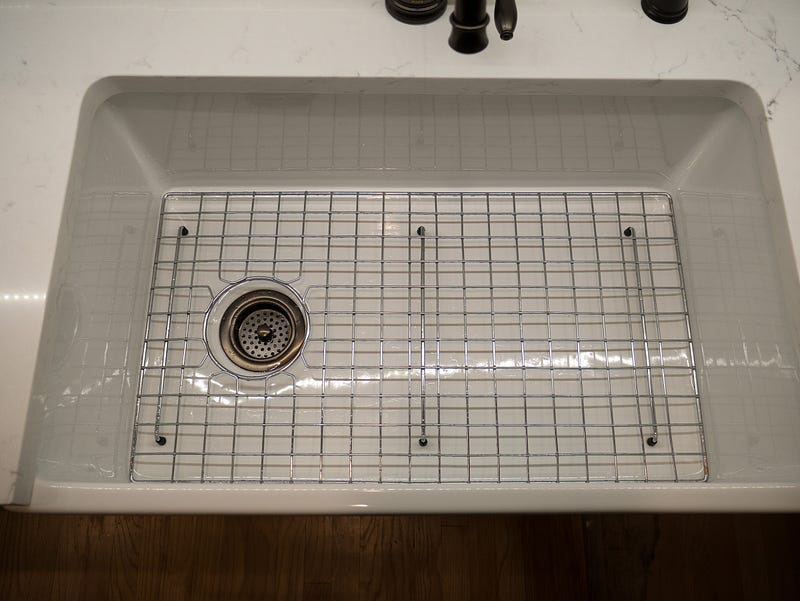
I know this is giving into trendiness to some extent but we both wanted a front apron farmhouse sink. It’s hard to know what brands are reputable besides Kohler or Rohl. I almost went with the Kohler farmhouse sink but it’s made of cast iron and not fireclay. People seem to think fireclay is more durable and I’m all about less maintenance, so I ended up getting one from Nantucket Sinks from Wayfair. It was much cheaper than a similar sink from Rohl and got good reviews on many sites.
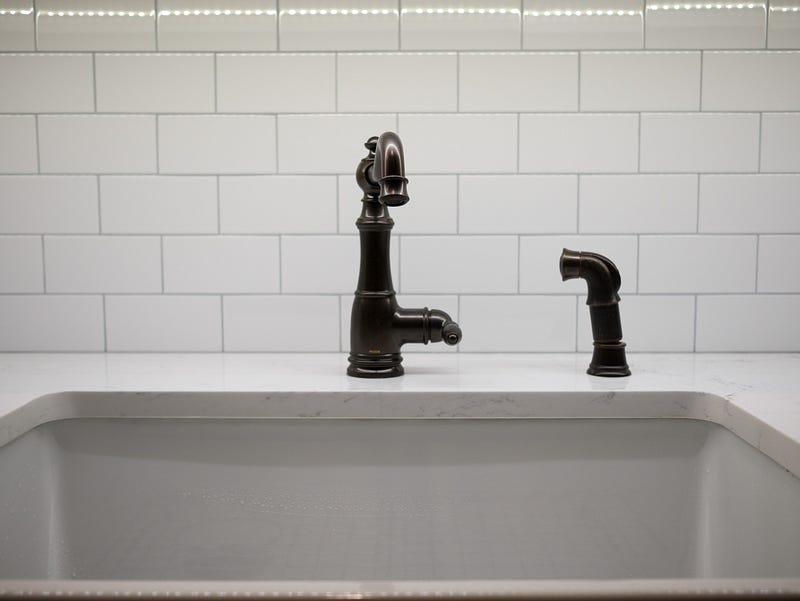
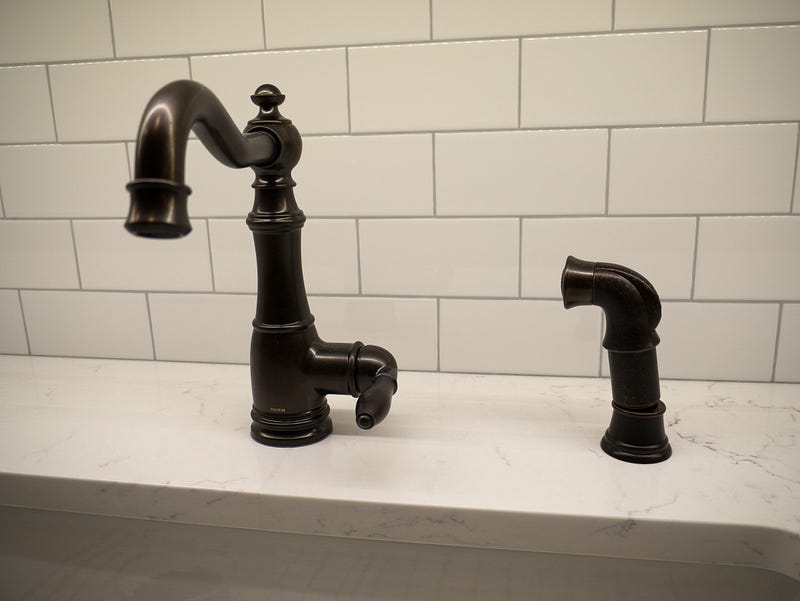
Faucet: Moen S72101ORB Weymouth One-Handle High Arc Kitchen Faucet
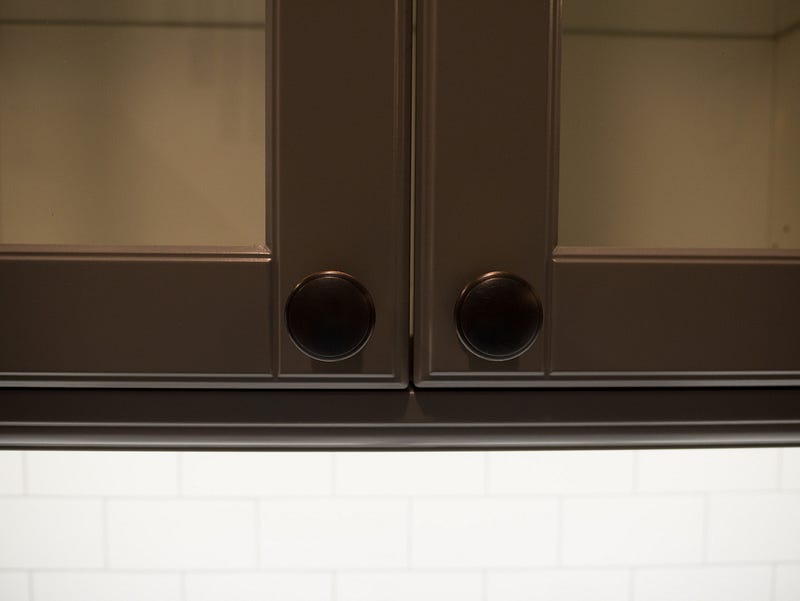
Since we moved into our home, we’ve been going with oil-rubbed bronze for all of our new fixtures, knobs, handles, etc., so we felt like we were stuck with going with oil-rubbed bronze for our kitchen fixtures too, including the faucet. Unfortunately there just aren’t a lot of oil-rubbed bronze faucets out there, especially when we also had to get one that wasn’t too tall, since we didn’t cut out the space above the sink. The only one I could find was one from Moen, which cost a lot more than I expected to pay for a faucet but I didn’t feel like we had many options.
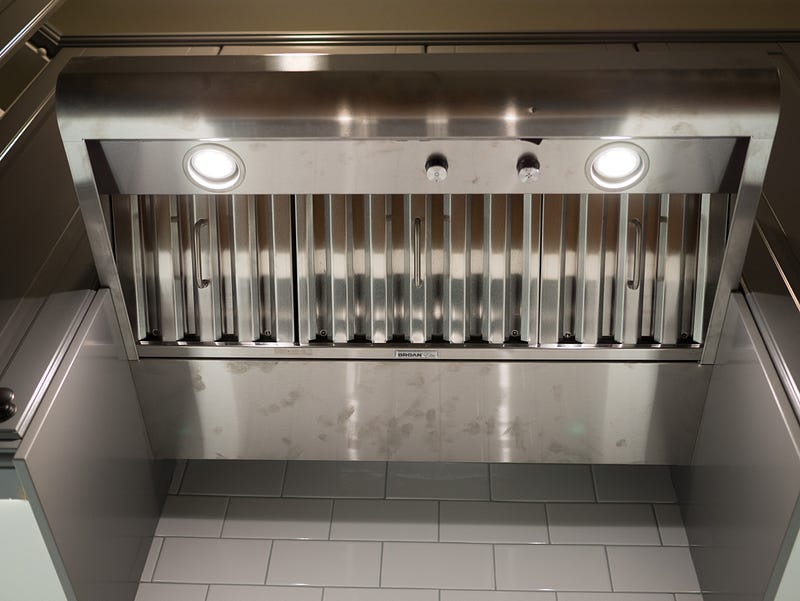
One nice surprise was the discovery of a proper vent behind the wall, which was unexpected because the hood that was in place was a simple recirculating hood which was pretty useless. It was a slight addition to the cost of our project to be able to hook into that but one that was worth it. I had purchased a recirculating hood, expecting that there wouldn’t be a vent pipe behind the wall, so I had to return that and get a new one.
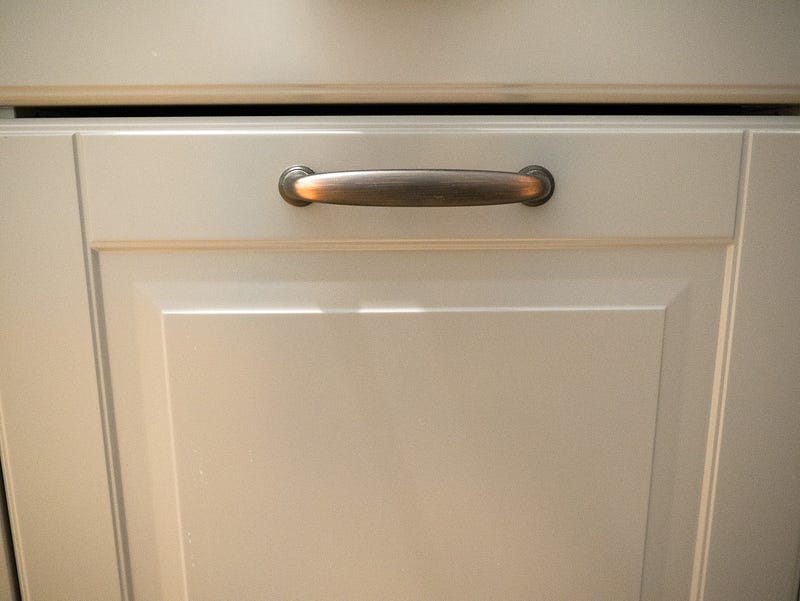
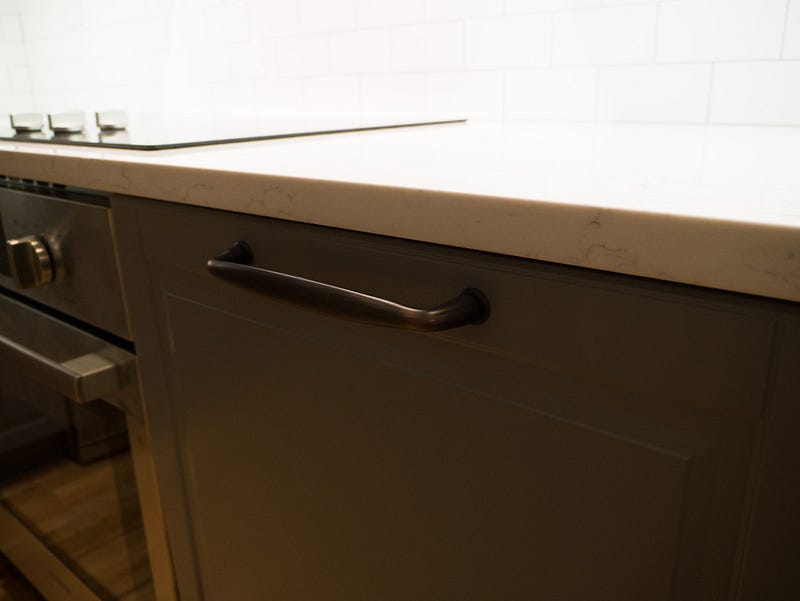
Knobs and pulls
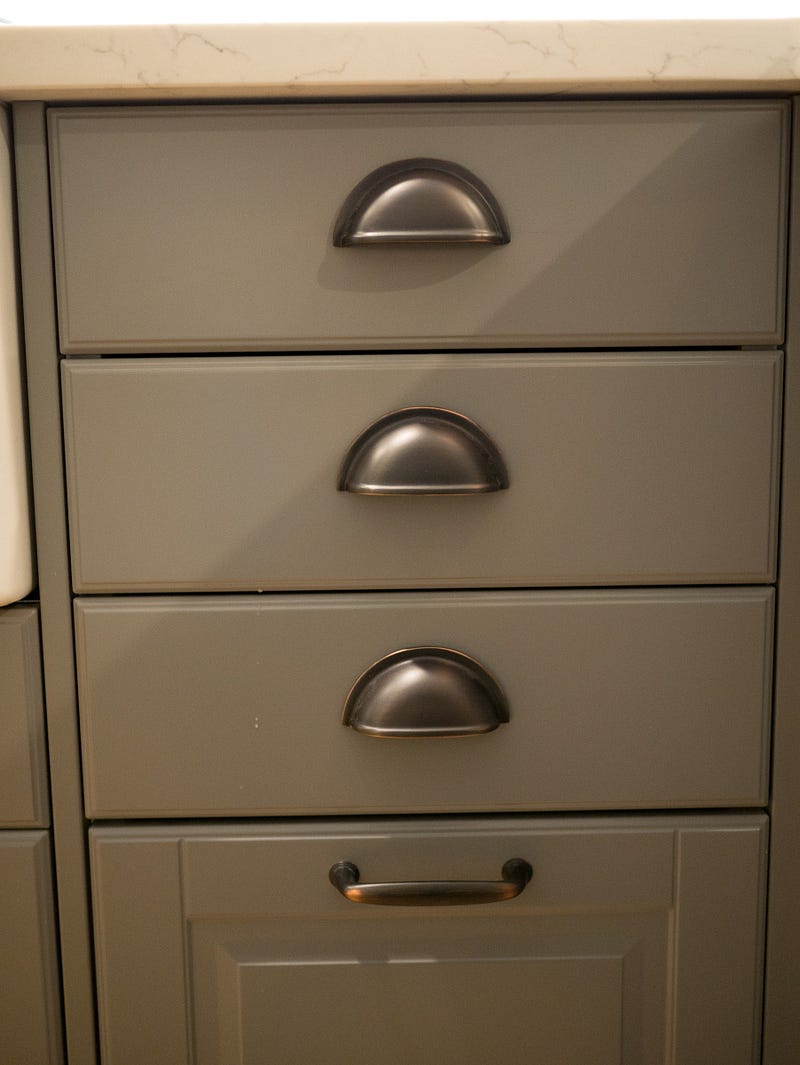
There are so many different types of knobs and pulls out there. You could drive yourself crazy by staring at the hundreds of styles out there. Maybe there are knob snobs out there but I didn’t think it was worth my time to look at a ton of different options. I’m not exactly sure how I ended up picking the knobs and pulls I did but we’re extremely happy with what we ended up with. The wife really wanted a few cup pulls but with the style of cabinets we have, it didn’t entirely make sense to install them on all our drawers, so we installed a few where we could, then installed regular pulls on other drawers.
The last little decision to make on the kitchen was for a light fixture over the breakfast bar. The previous lighting fixture was a track light. It had to be moved anyways because of extending the kitchen. They used halogen bulbs which got really hot. We never used them because of how hot the bulbs got.
Again, we went with something that was oil rubbed bronze.
Light fixture: Innovations Lighting Glass Bell 1 Light Pendant
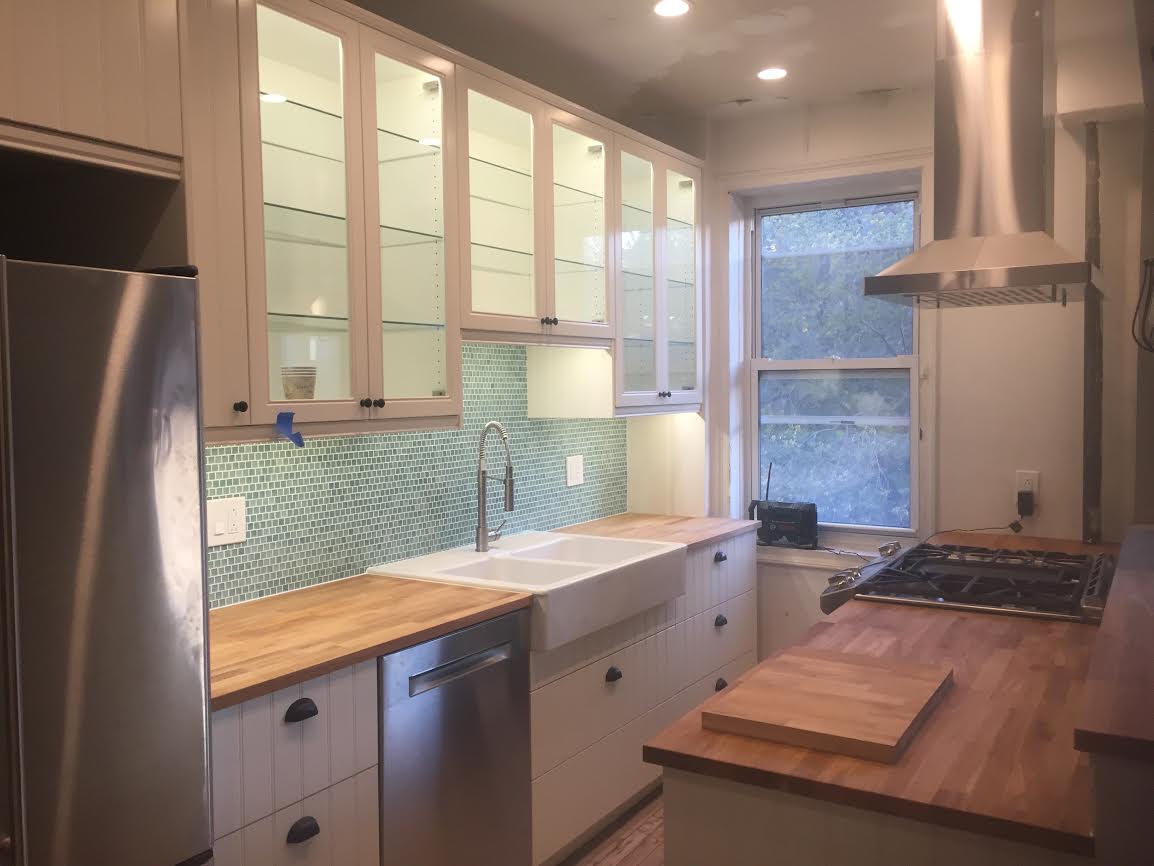
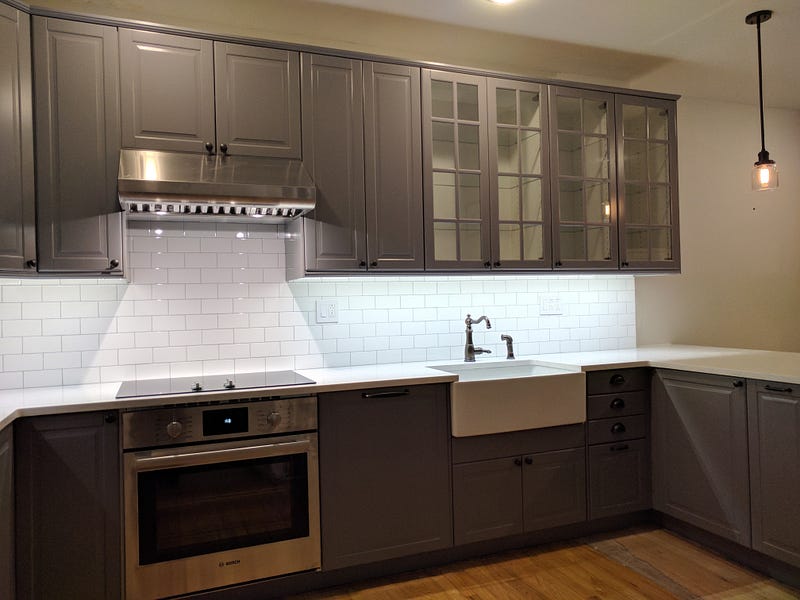
The renovation took a little bit longer than we originally expected but solely due to the delay in the counter top. Peter and Lissa’s estimated schedule for their work was spot on. In the end, we were super pleased with the final result! I don’t think there’s any decision (of the many detailed above) that we regret.
Peter’s attention to detail in his work is second to none — I wouldn’t expect anything less from an RPI engineering alum. 🙂 It’s so hard to find service professionals these days who provide the quality of work that Basic Builders did. From his original on-site visit to giving his honest opinion on every question we had along the way and obviously the gorgeous final result — absolutely an amazing experience and we look forward to recommending them for anyone in the NYC metro area interested in doing a kitchen renovation with IKEA cabinets.